Quickstart
Install the Supermetal agent, then create your first connector through the web UI.
Install and start the agent
Install the agent
Download and run the installation script for your platform.
curl -fsSL https://trial.supermetal.io/install.sh | shiwr -useb https://trial.supermetal.io/install.ps1 | iexDownload directly from trial.supermetal.io
Start the agent
supermetal --serverEncryption passphrase
The agent prompts for a passphrase and uses it to encrypt connector credentials at rest. Enter the same passphrase each time you restart the agent.
The dashboard is now available at http://localhost:3000.
Create a connector
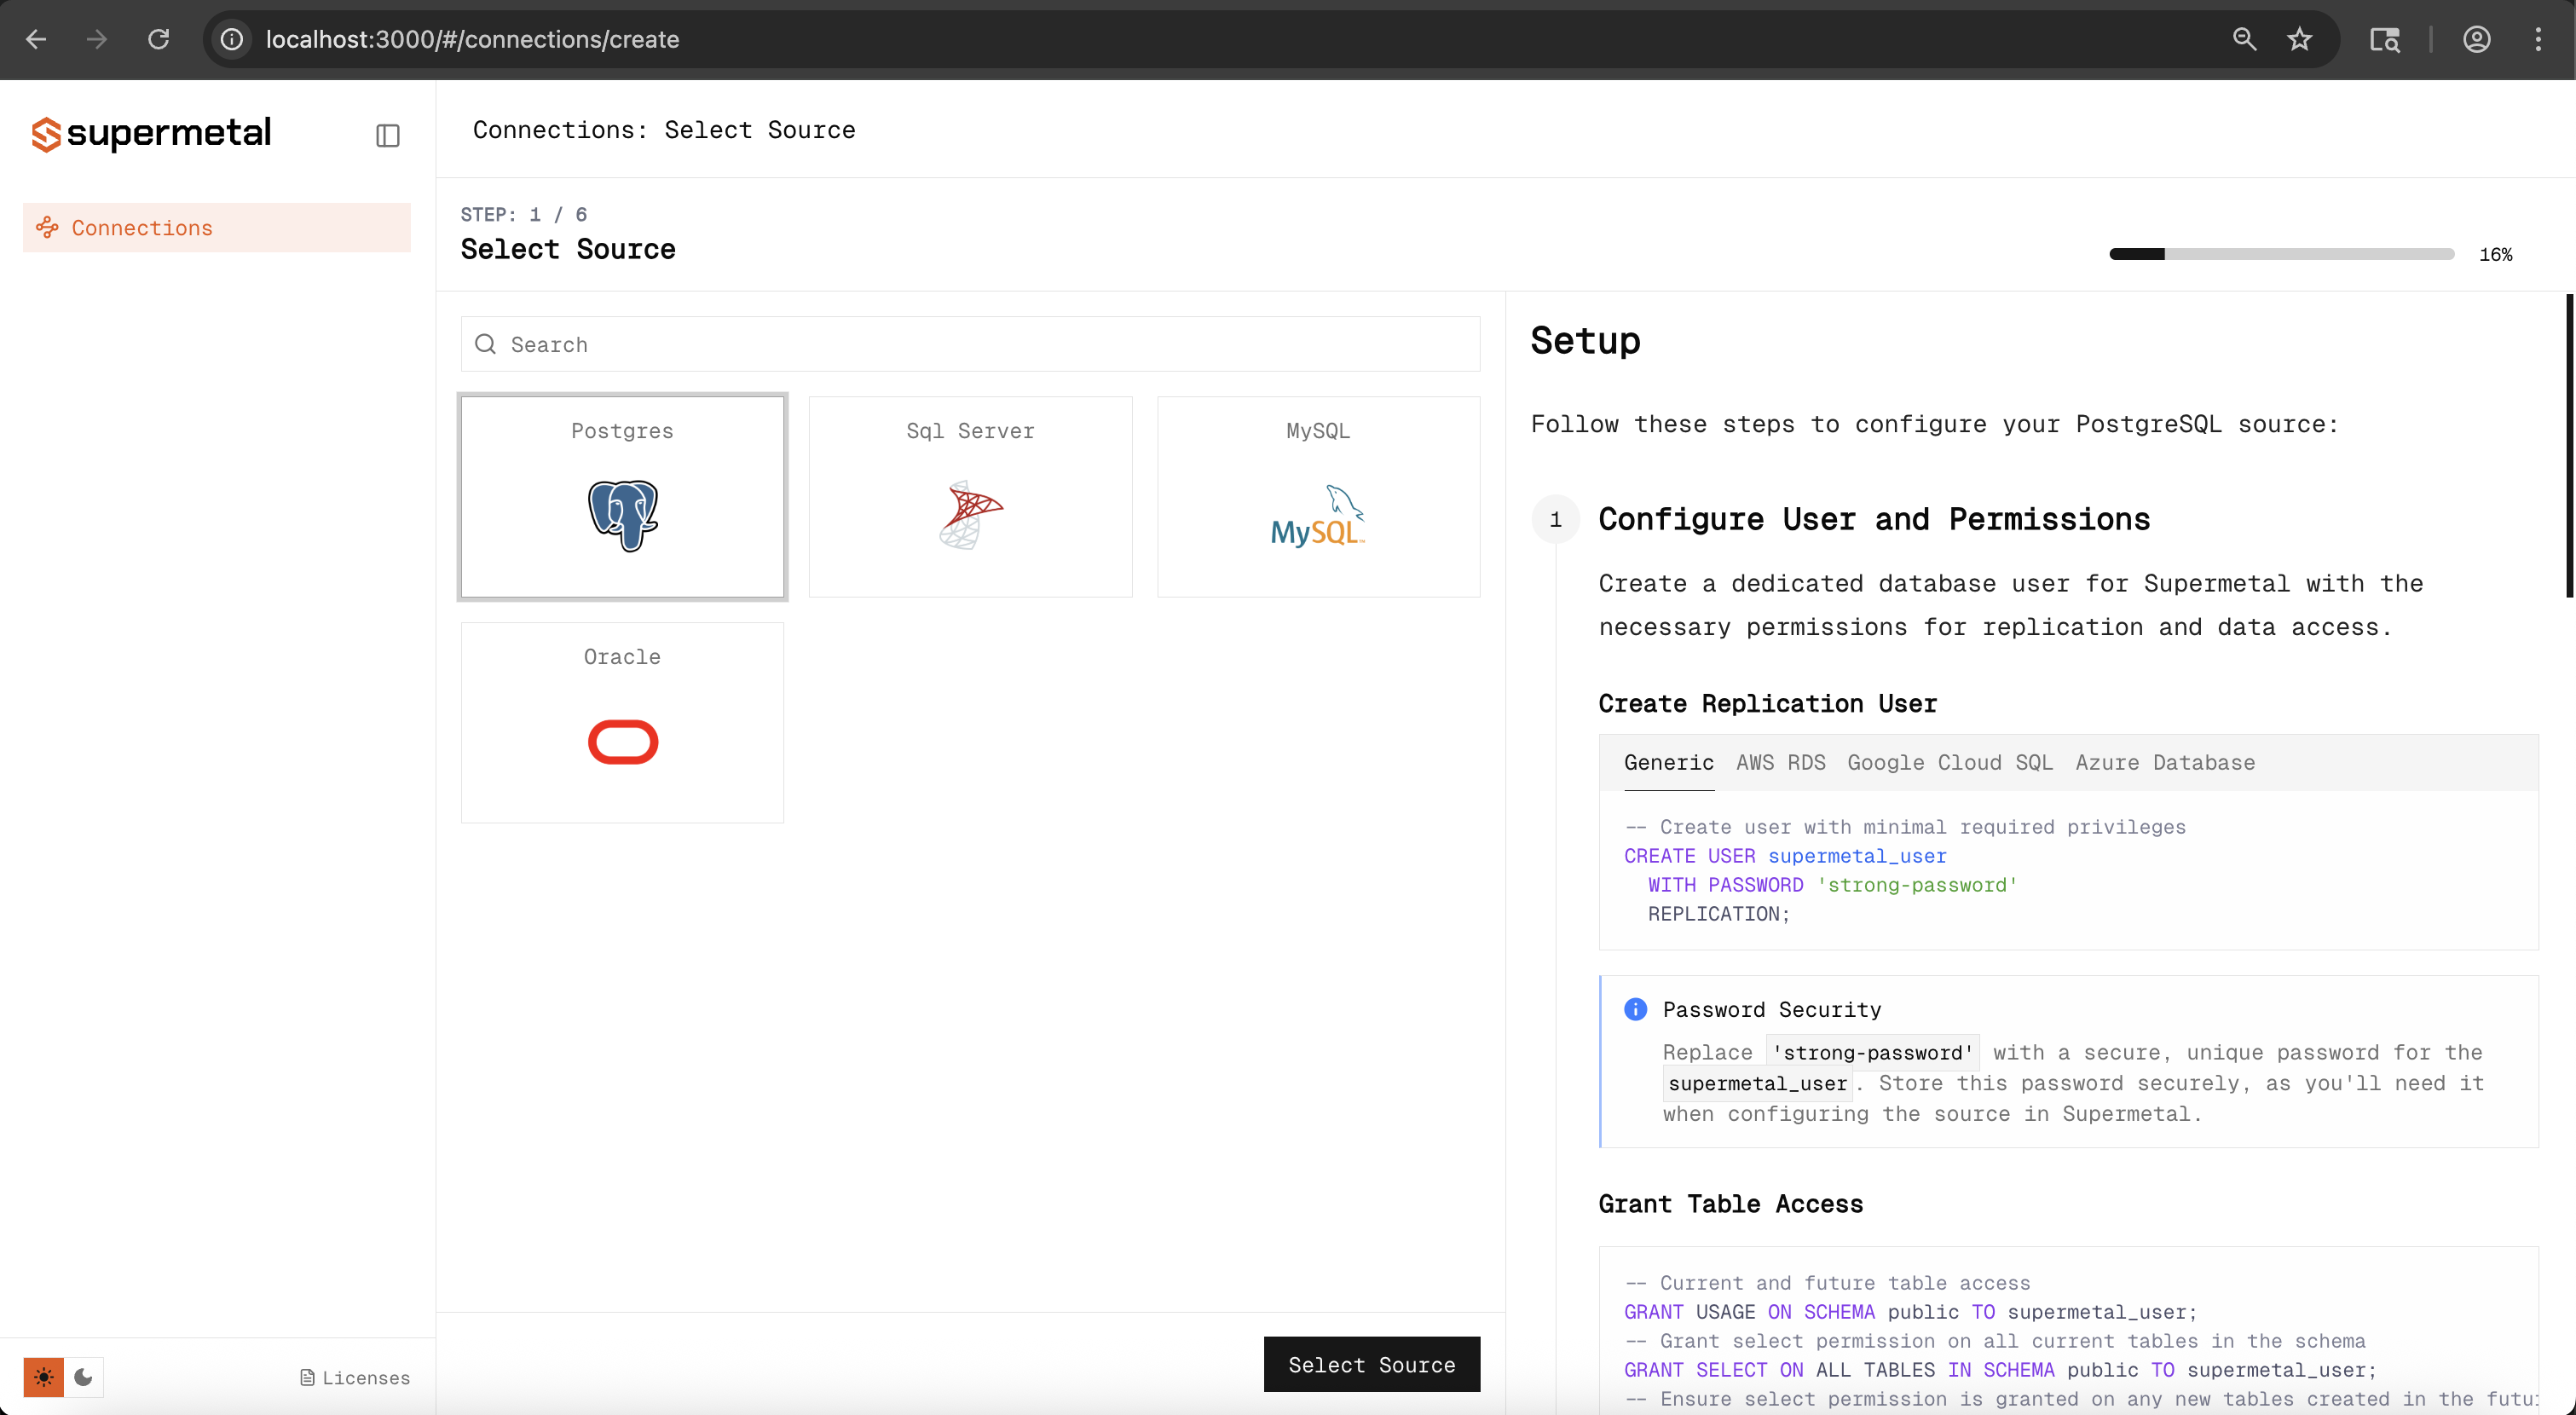
Connect the source
Select the source database type.

Enter the connection details. Hostname, port, database name, and credentials.
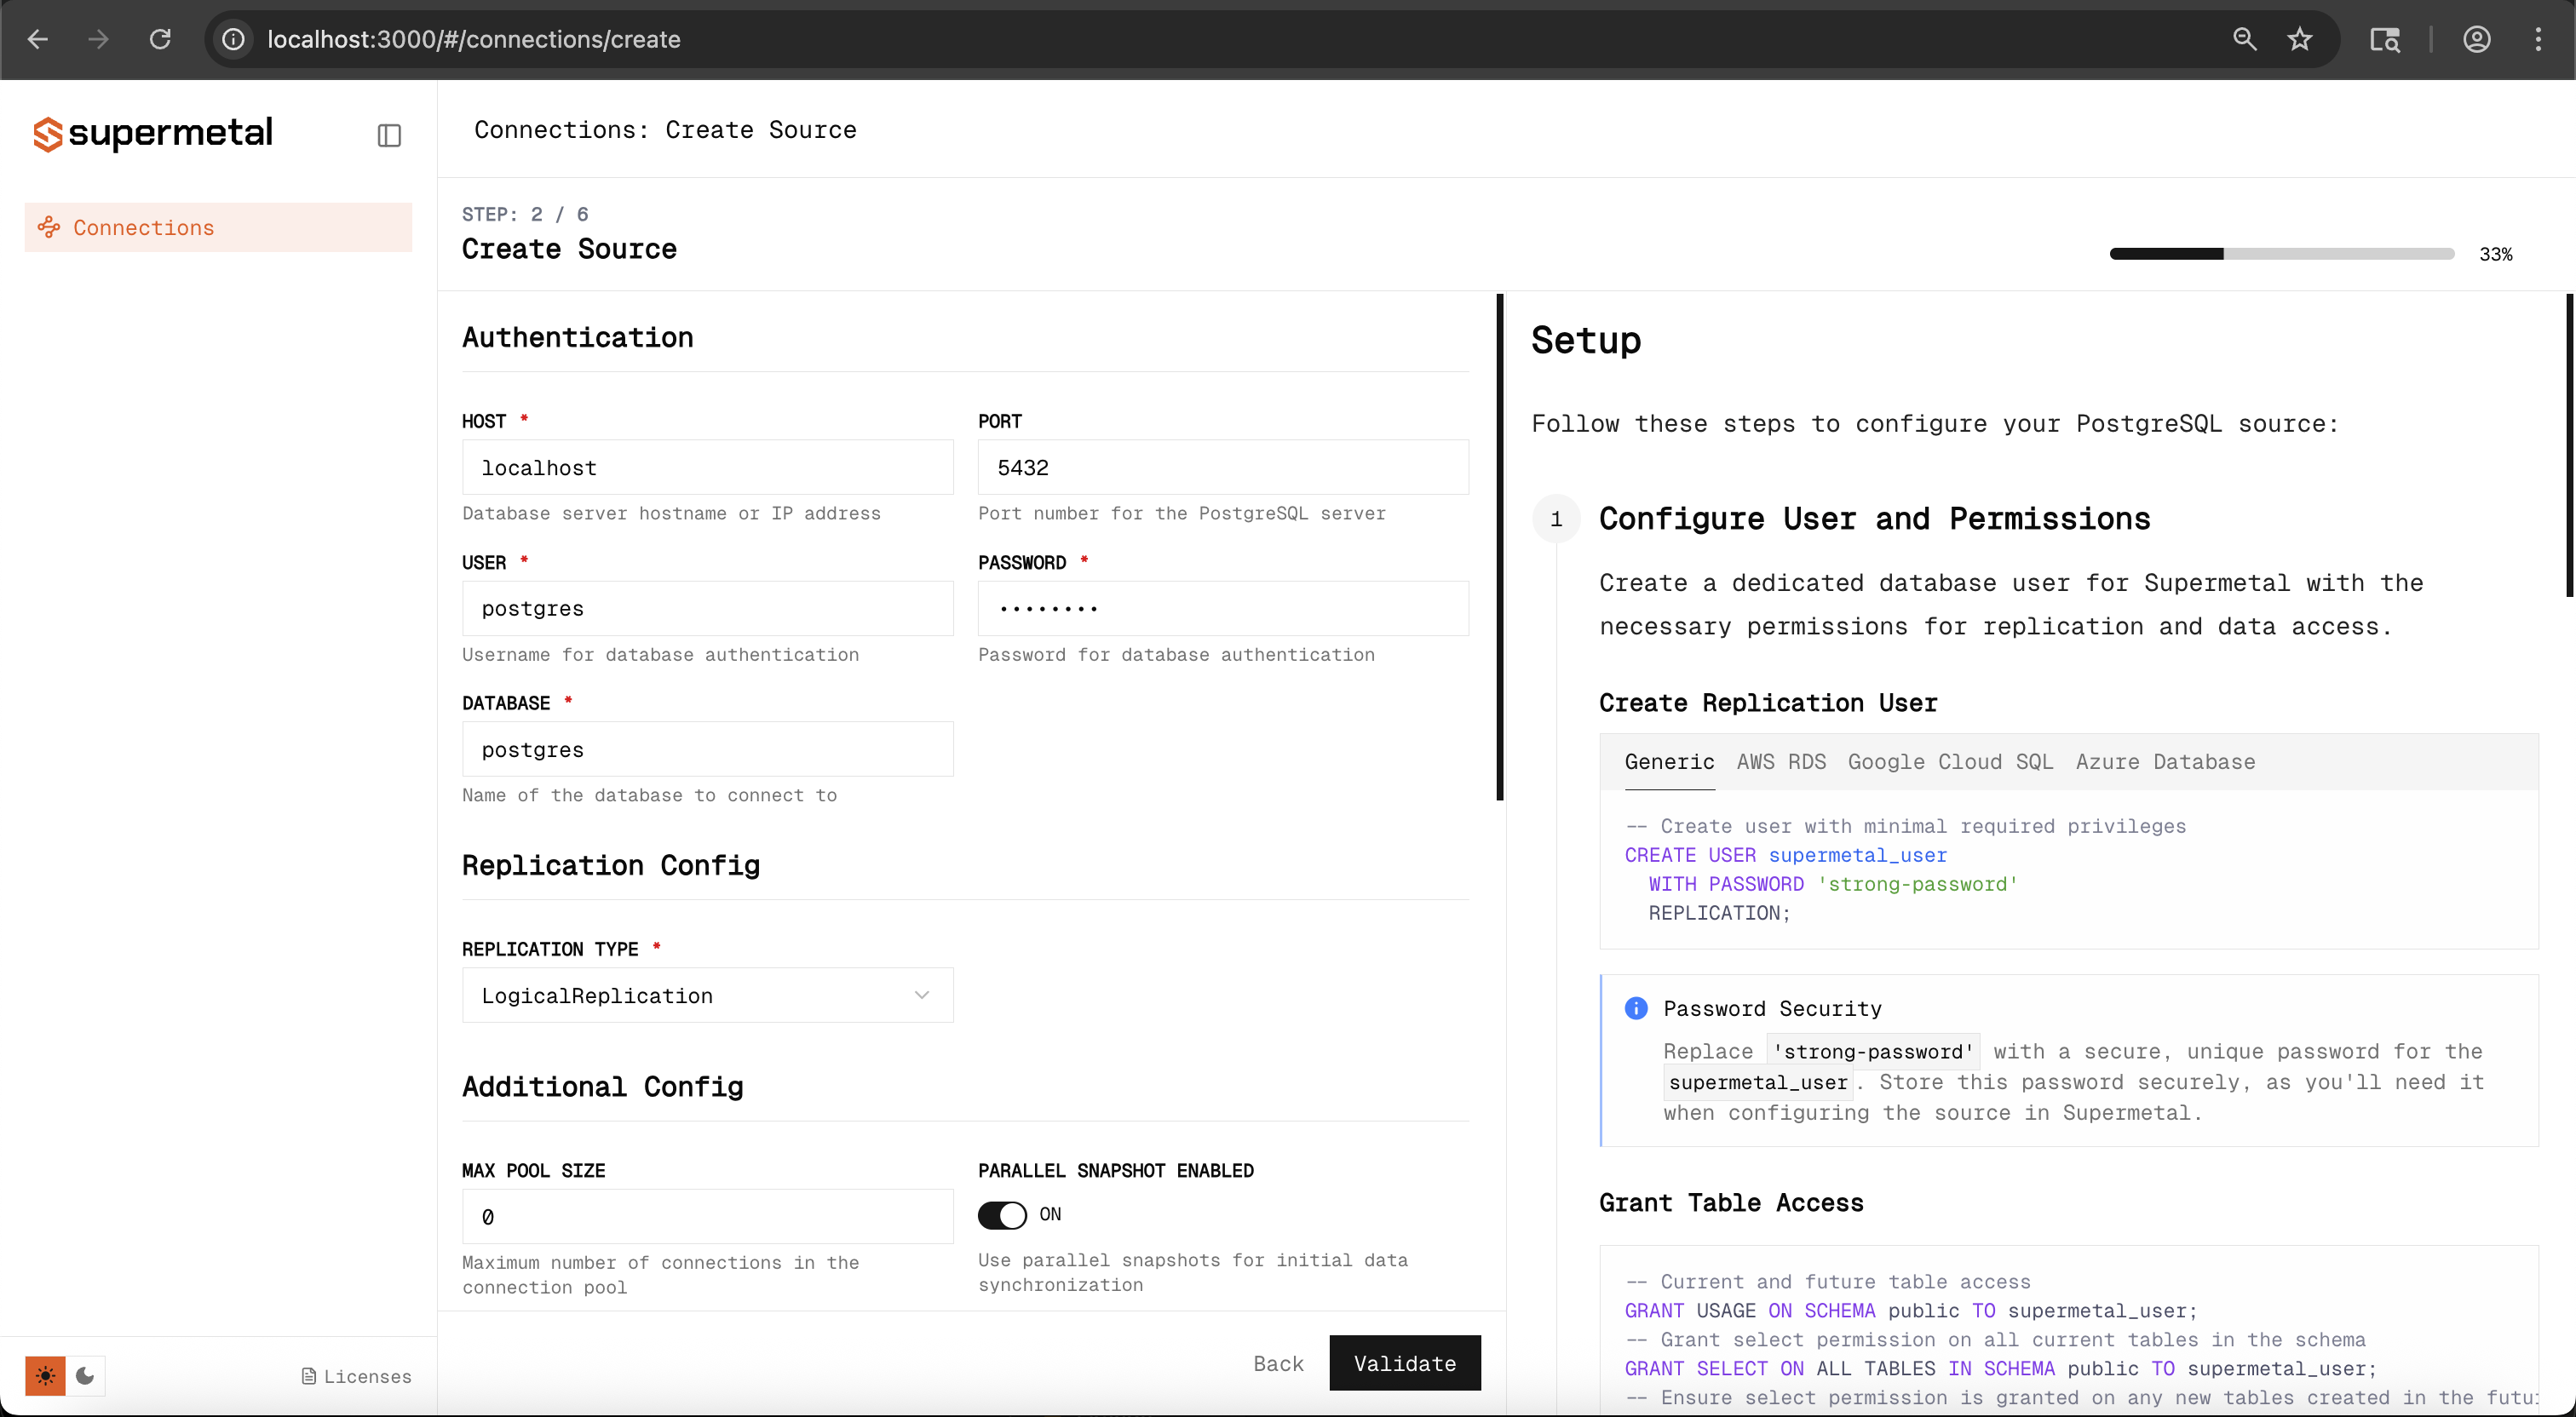
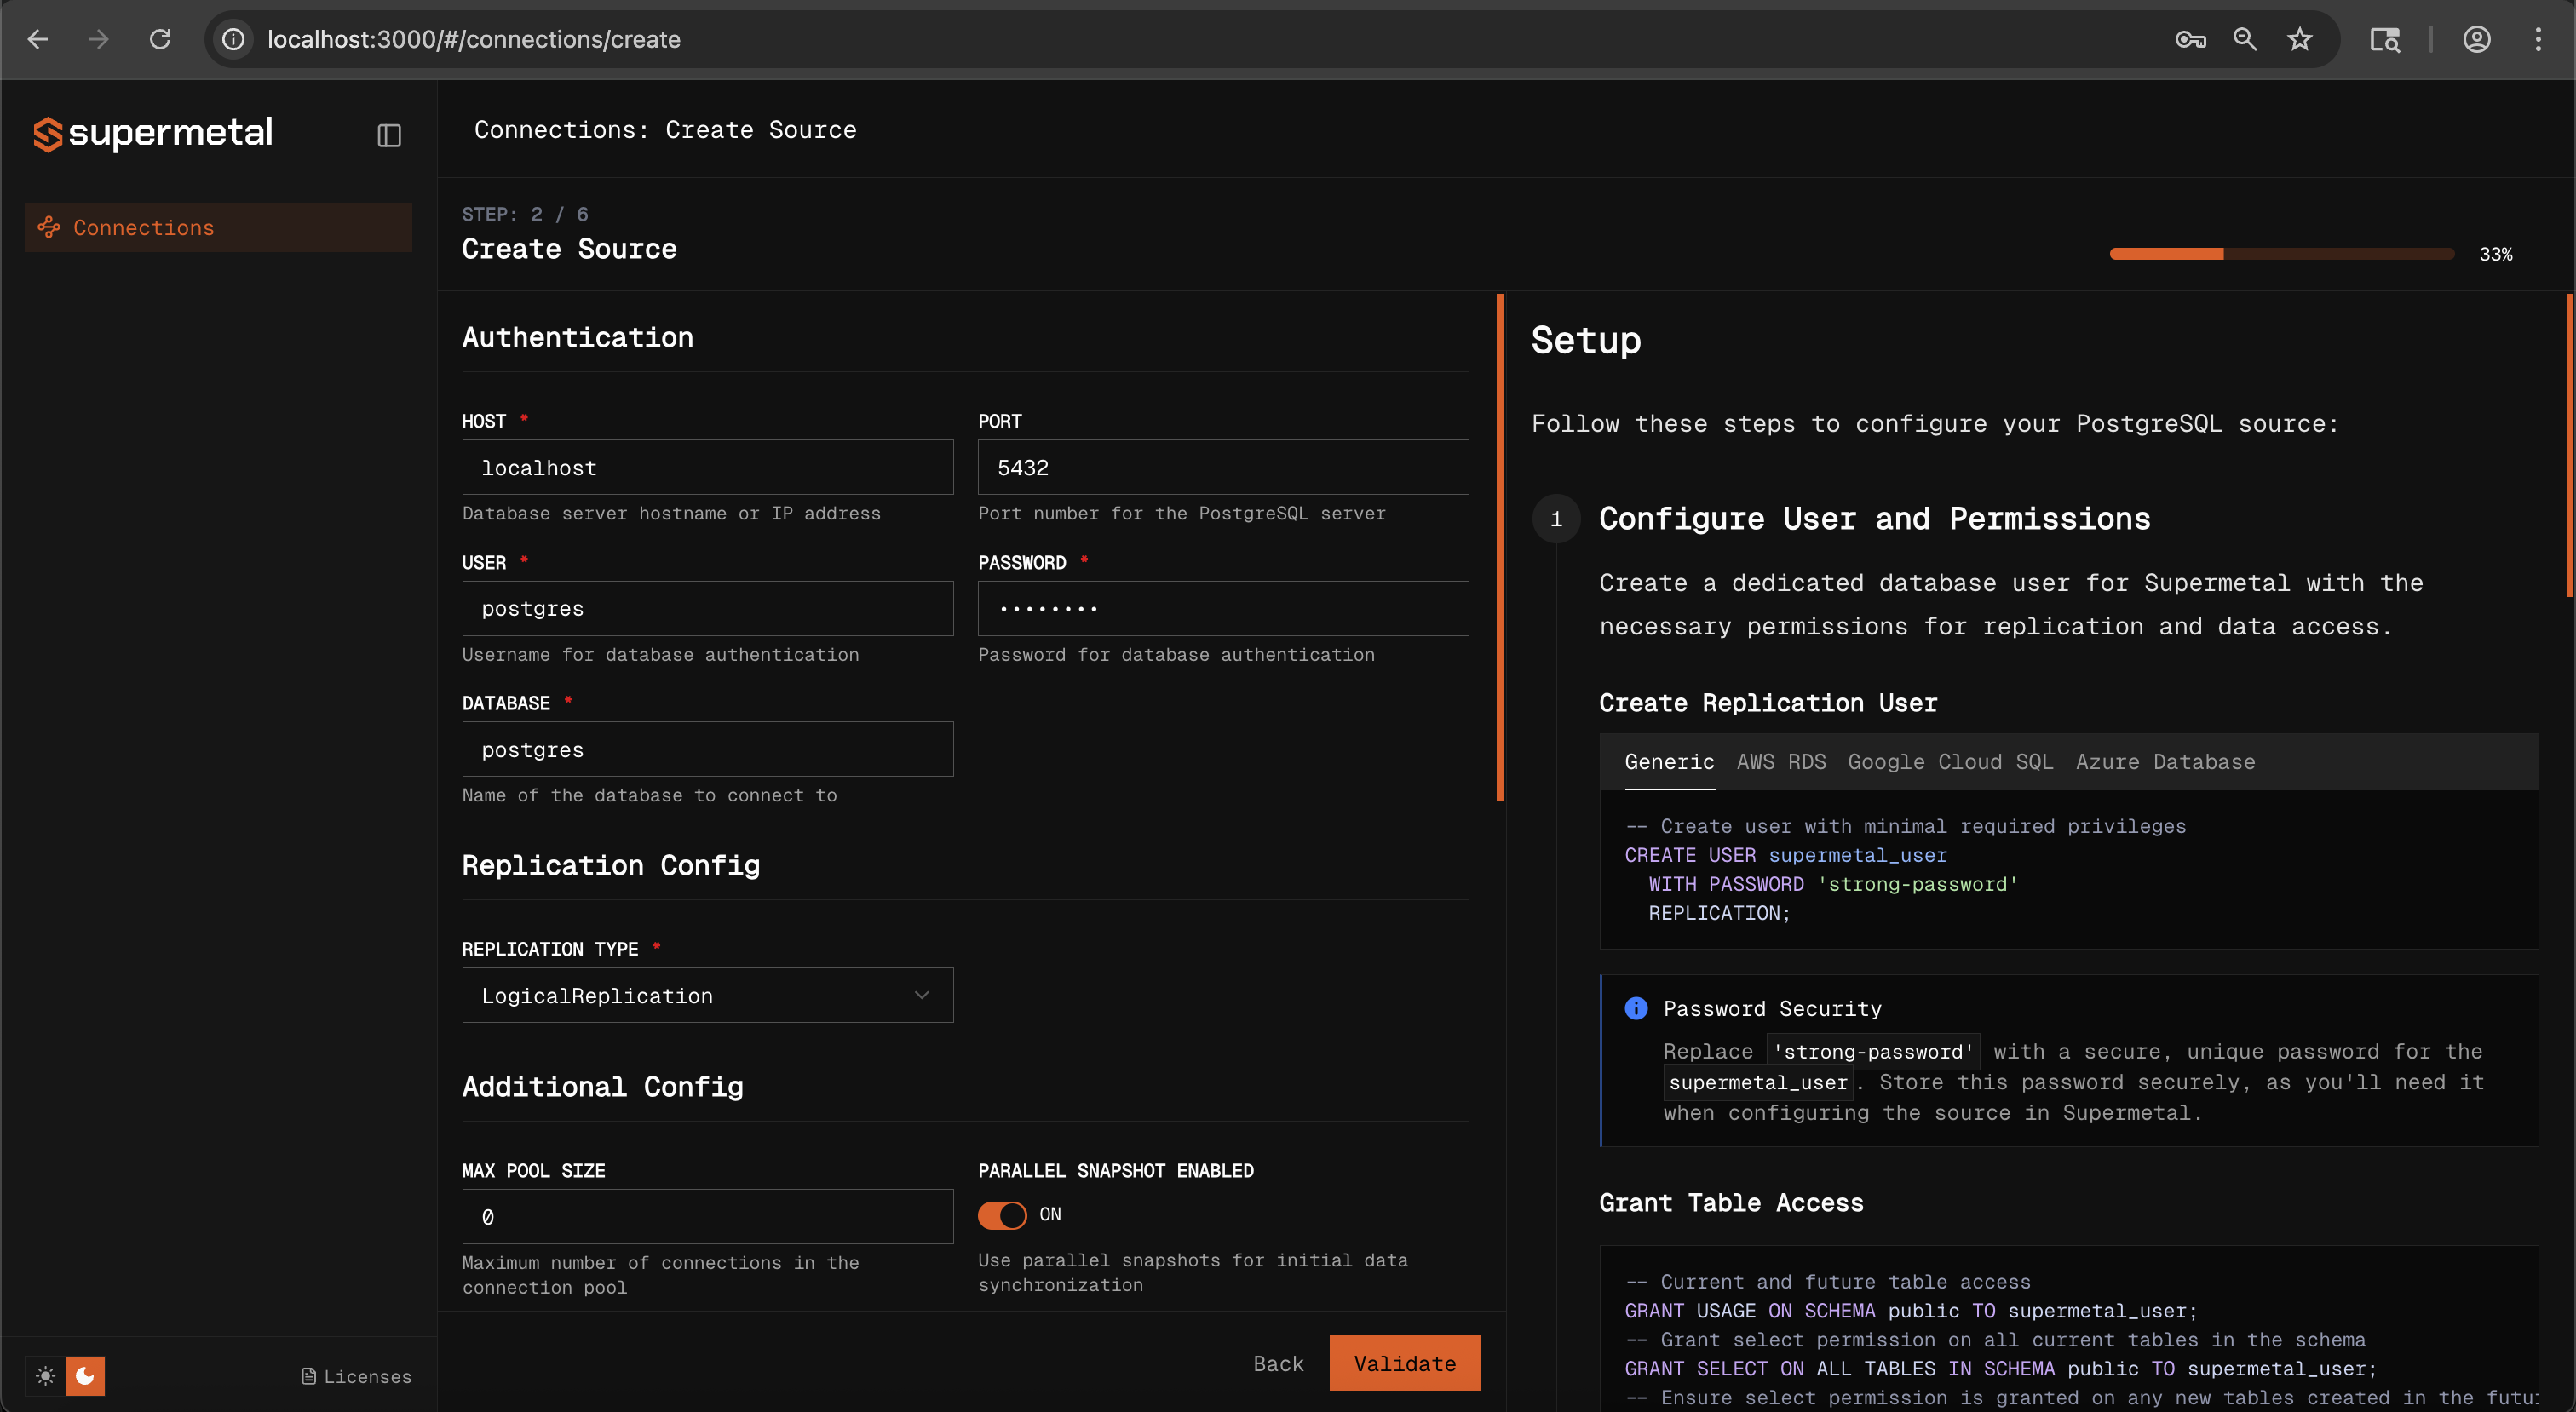
Validate. Supermetal tests the connection and checks configuration and permissions.


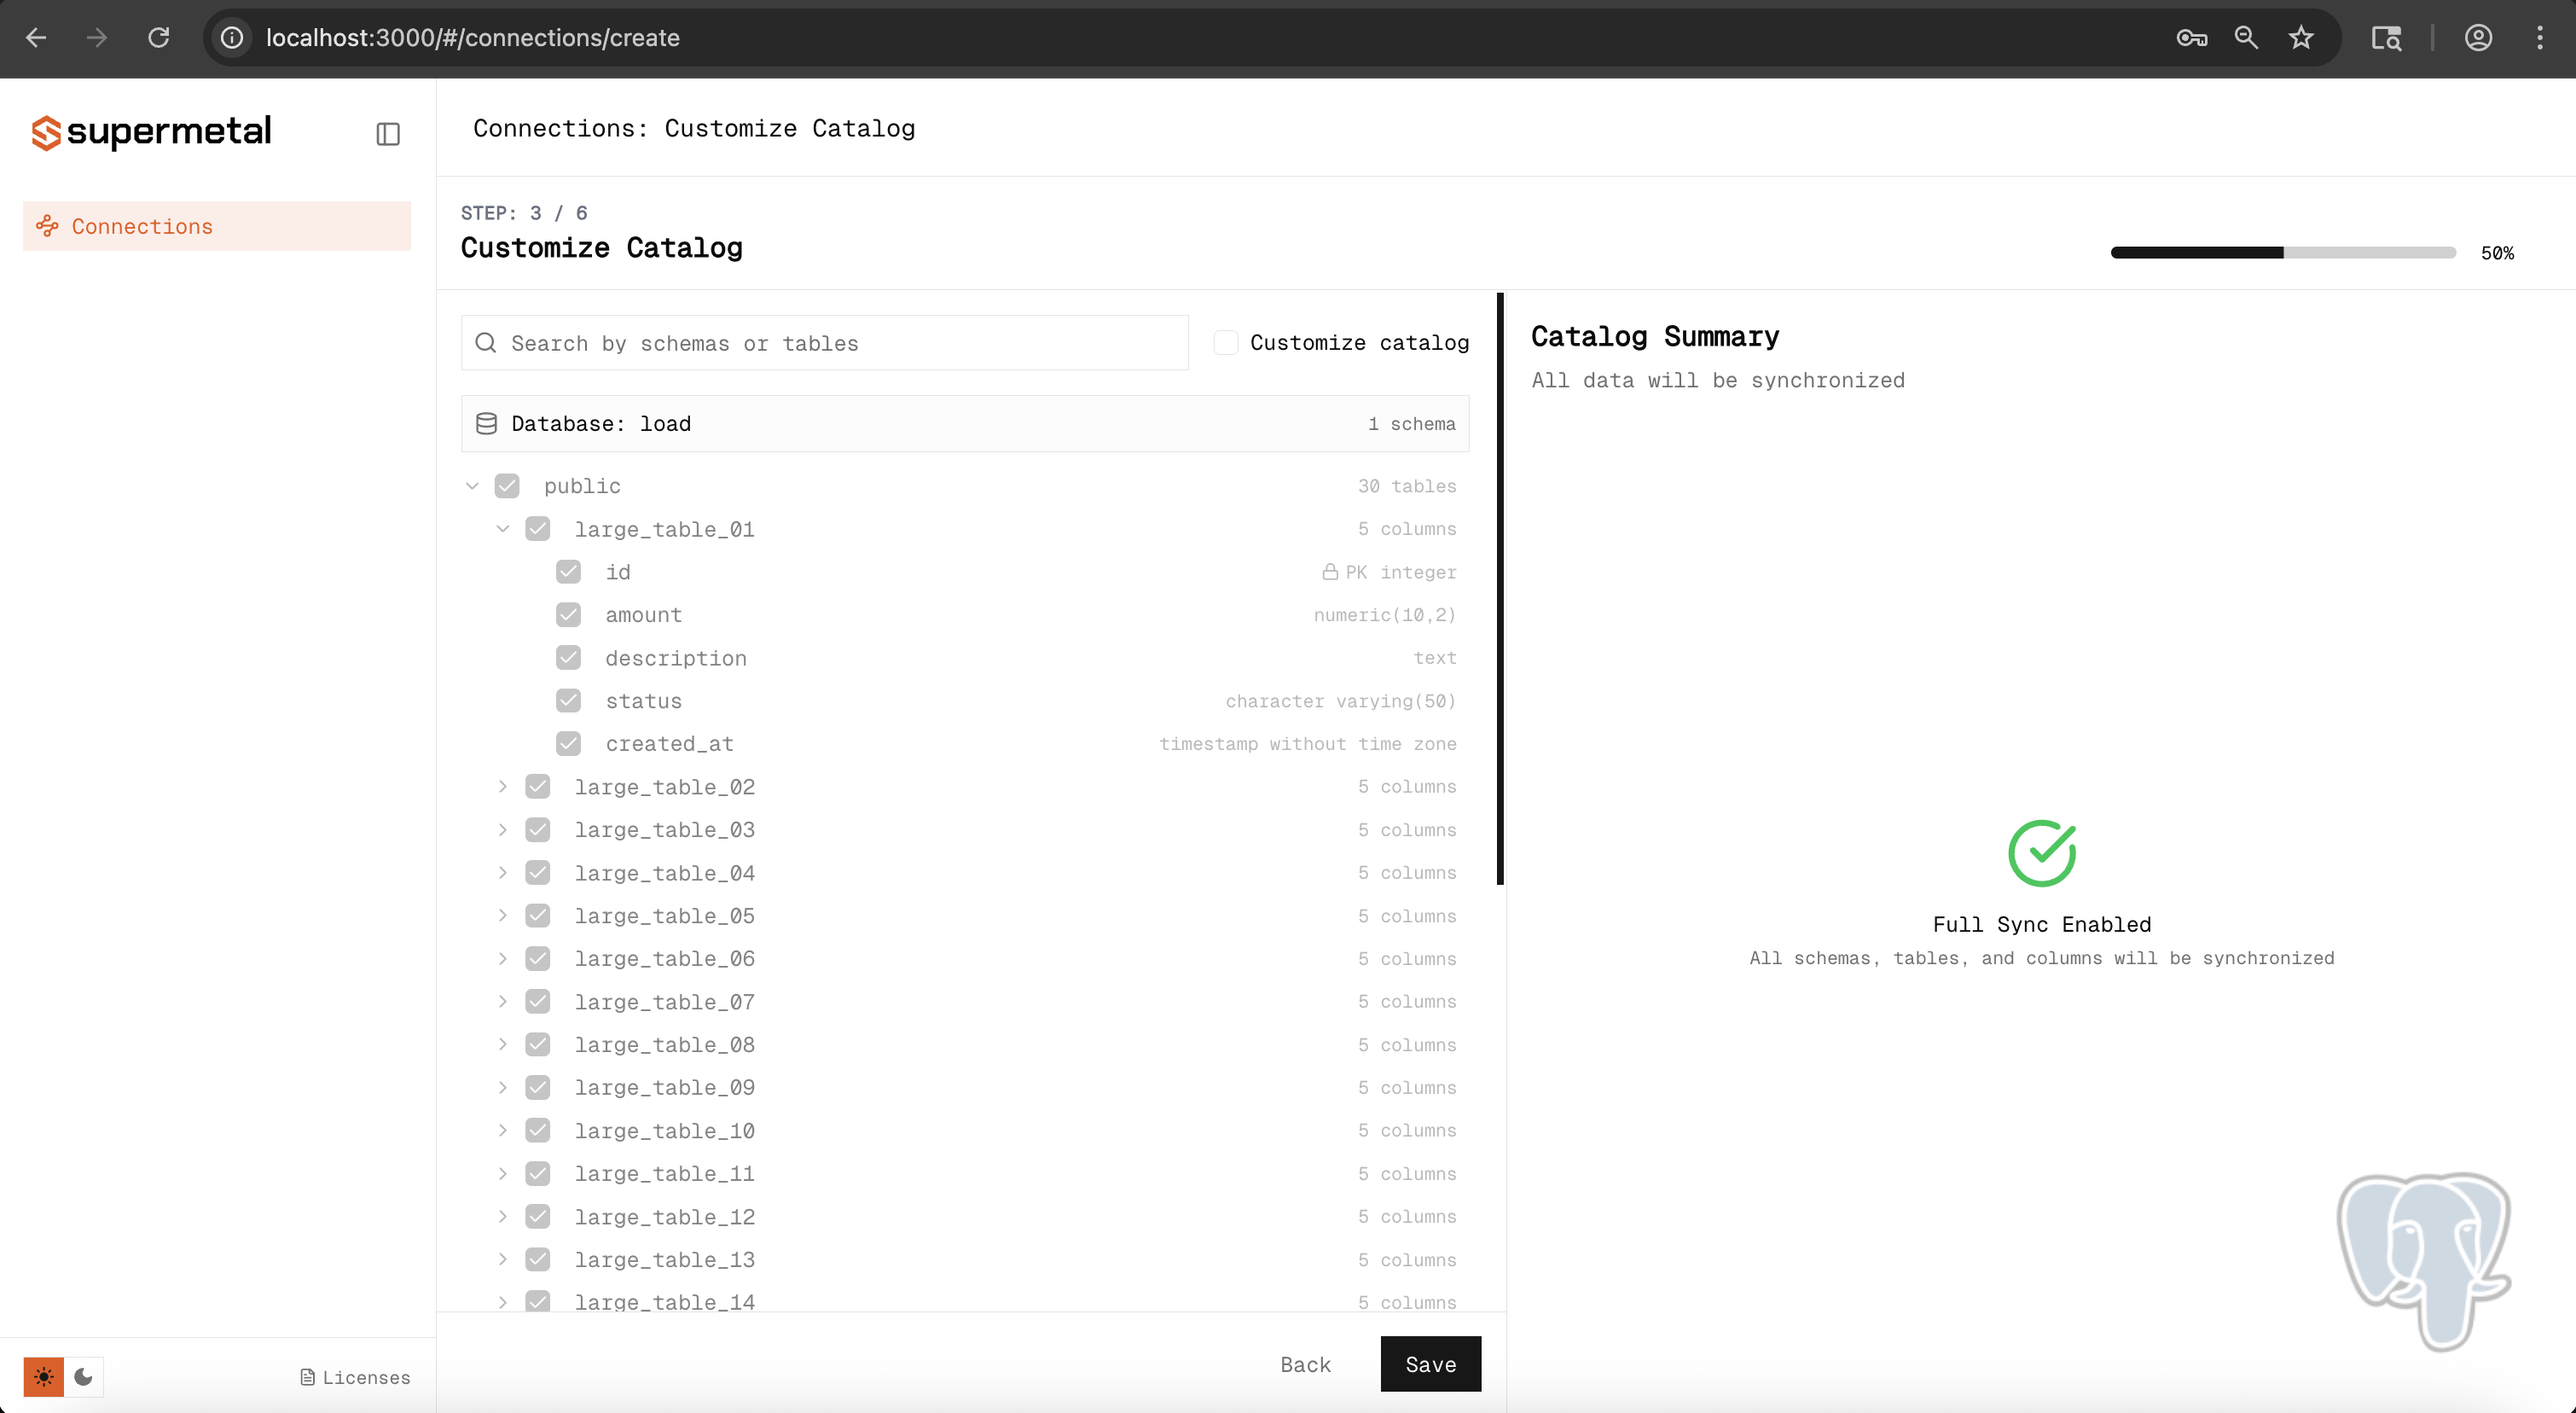
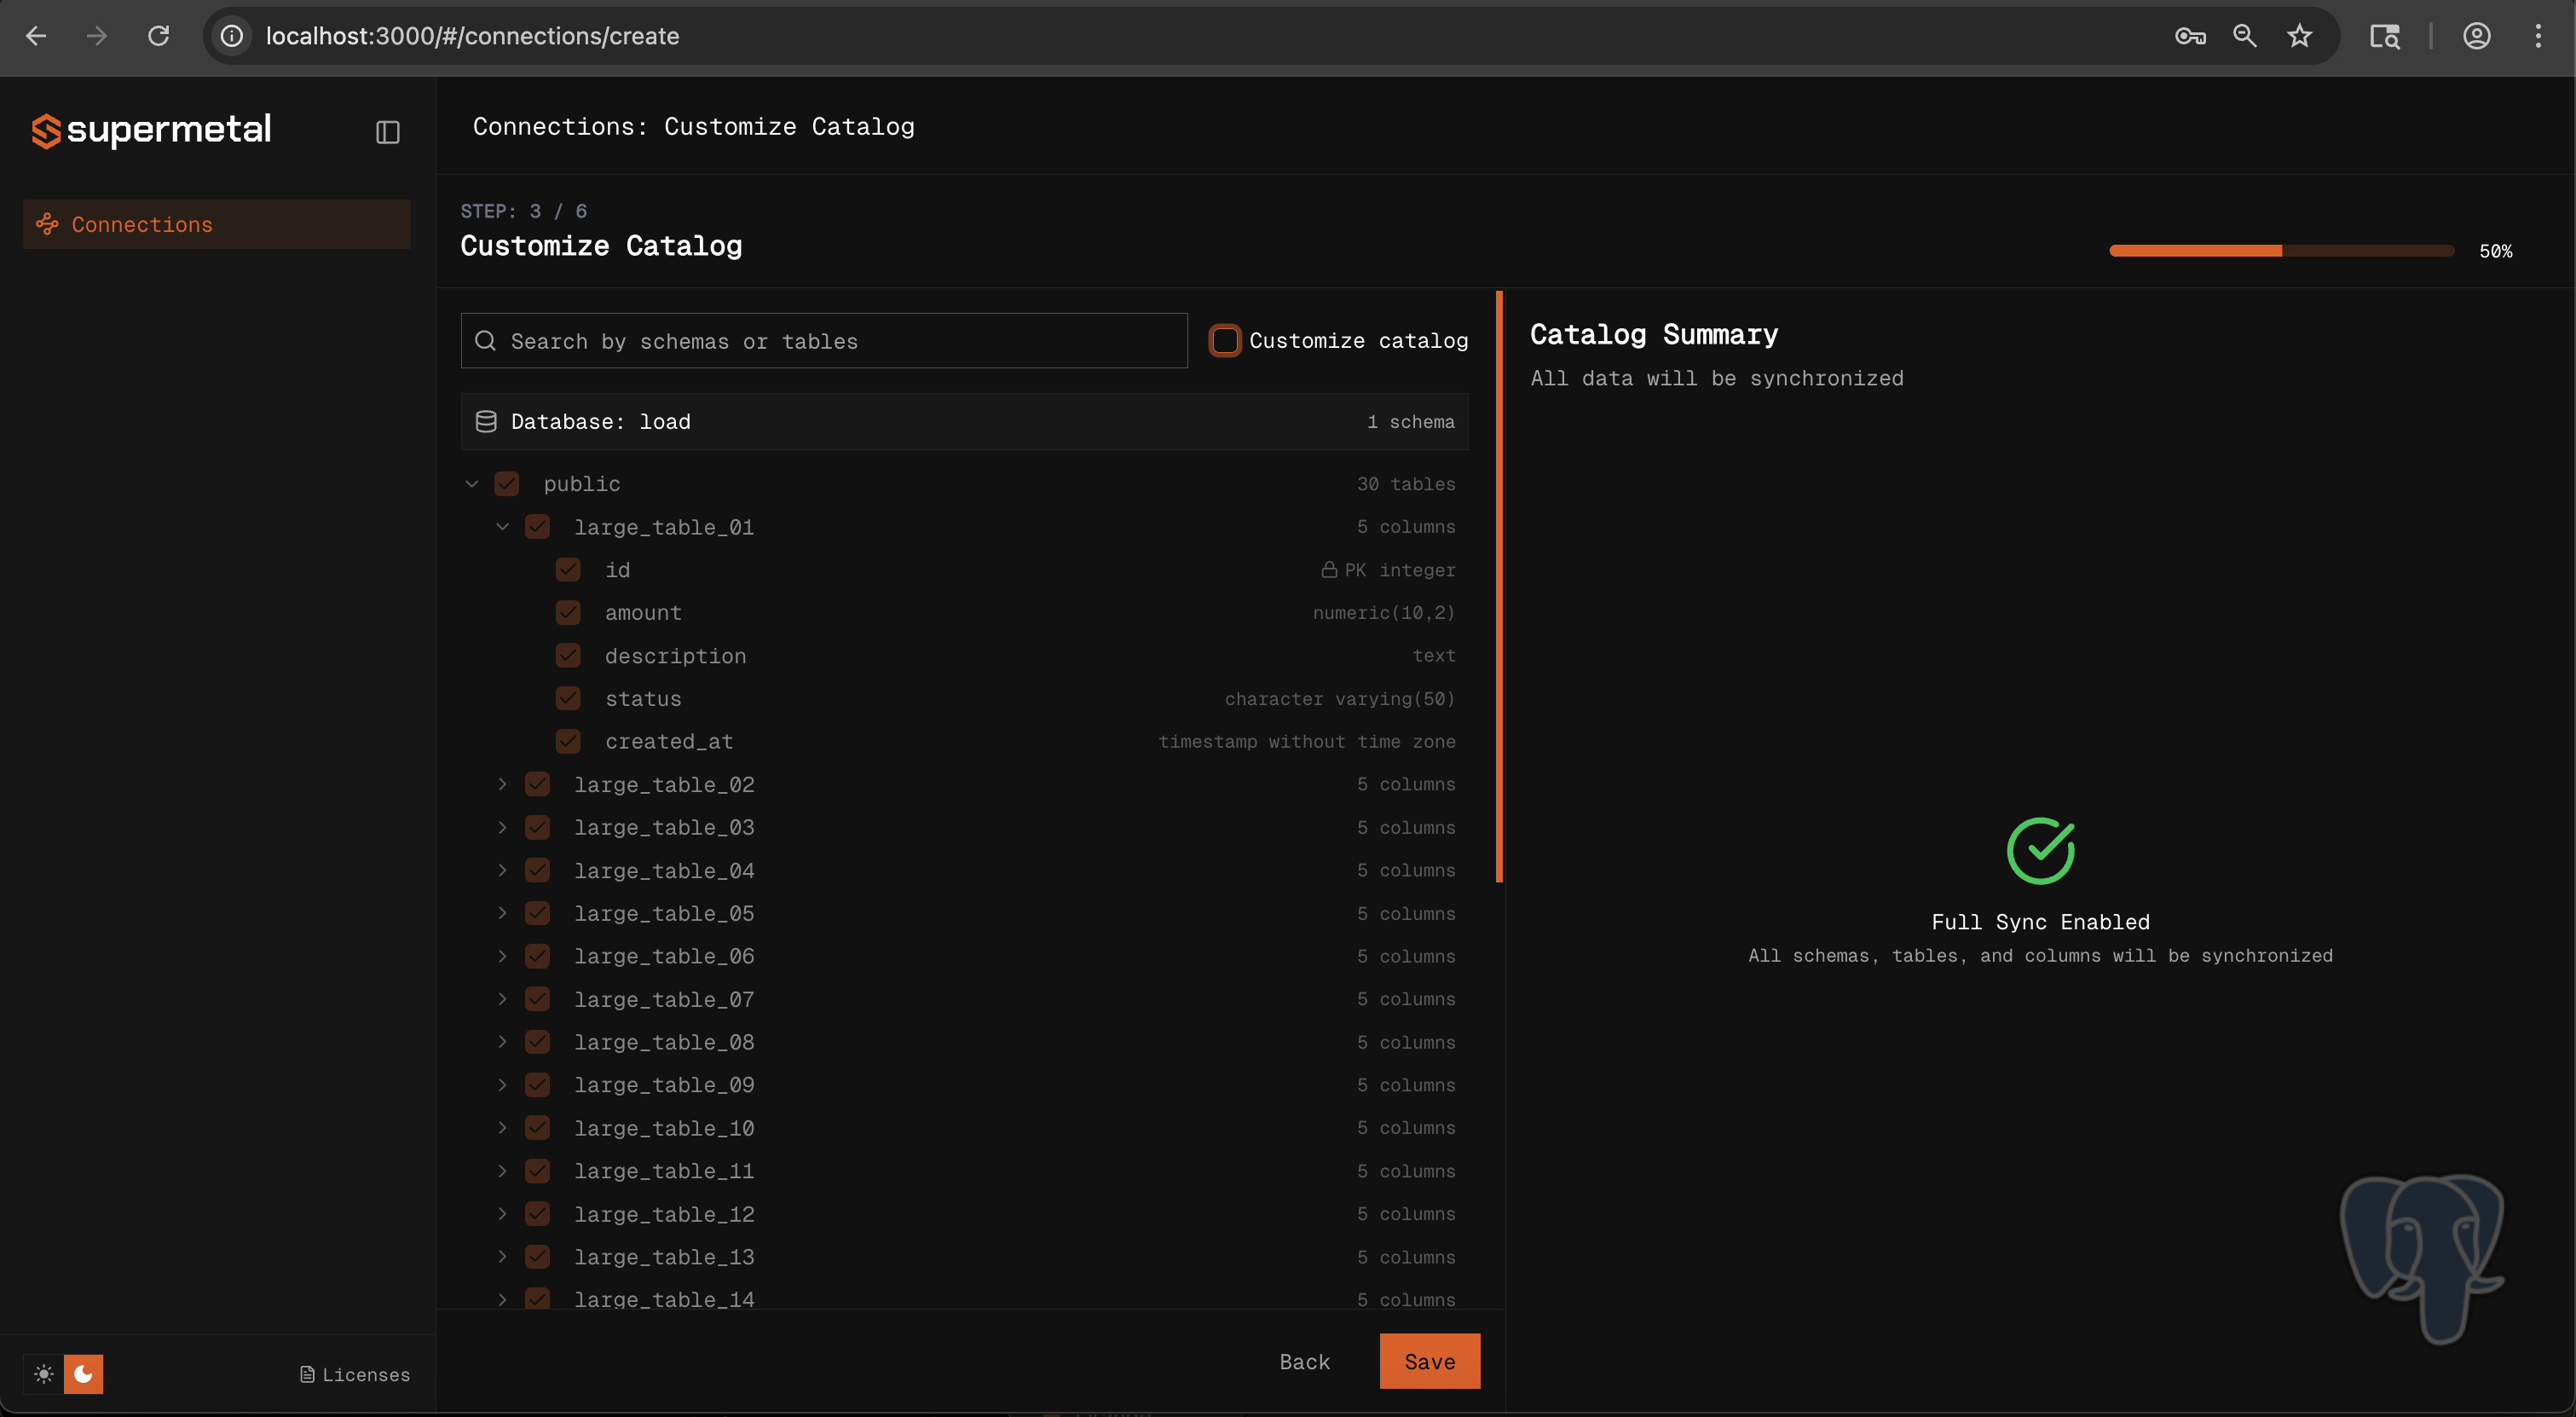
Choose tables and columns (optional)
Supermetal replicates all discoverable schemas, tables, and columns by default. To narrow the scope, select specific ones (see catalog filtering).
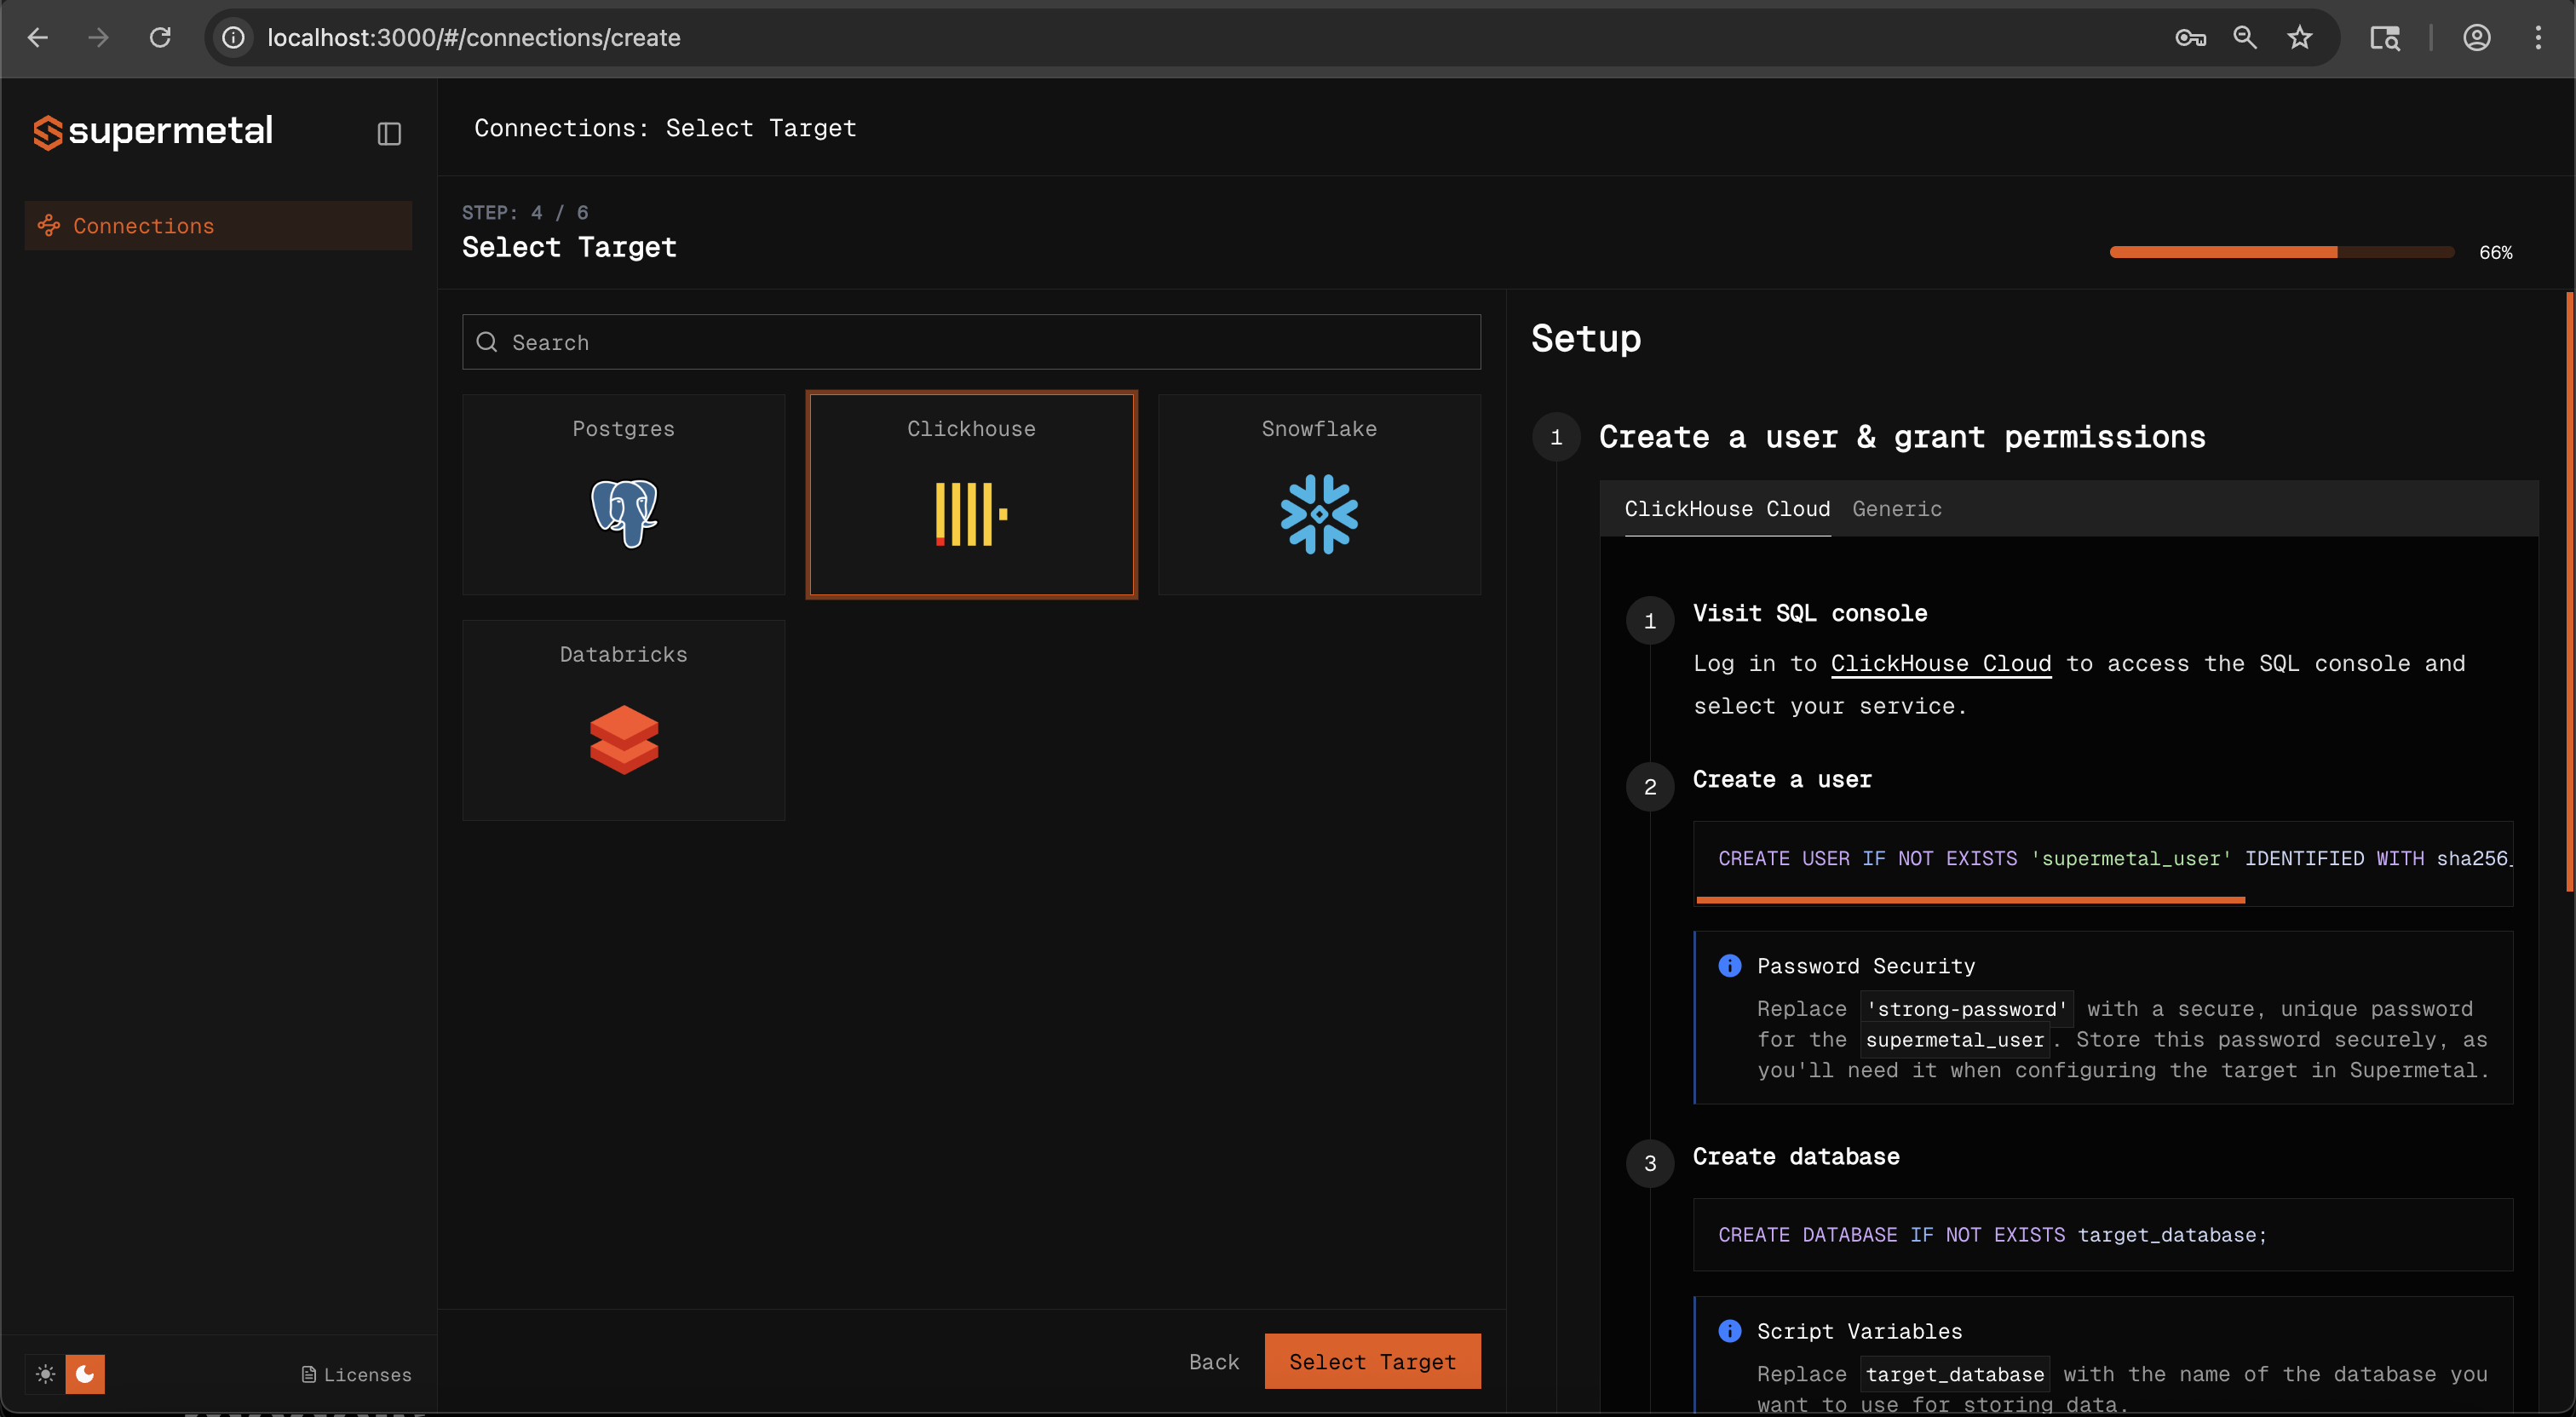
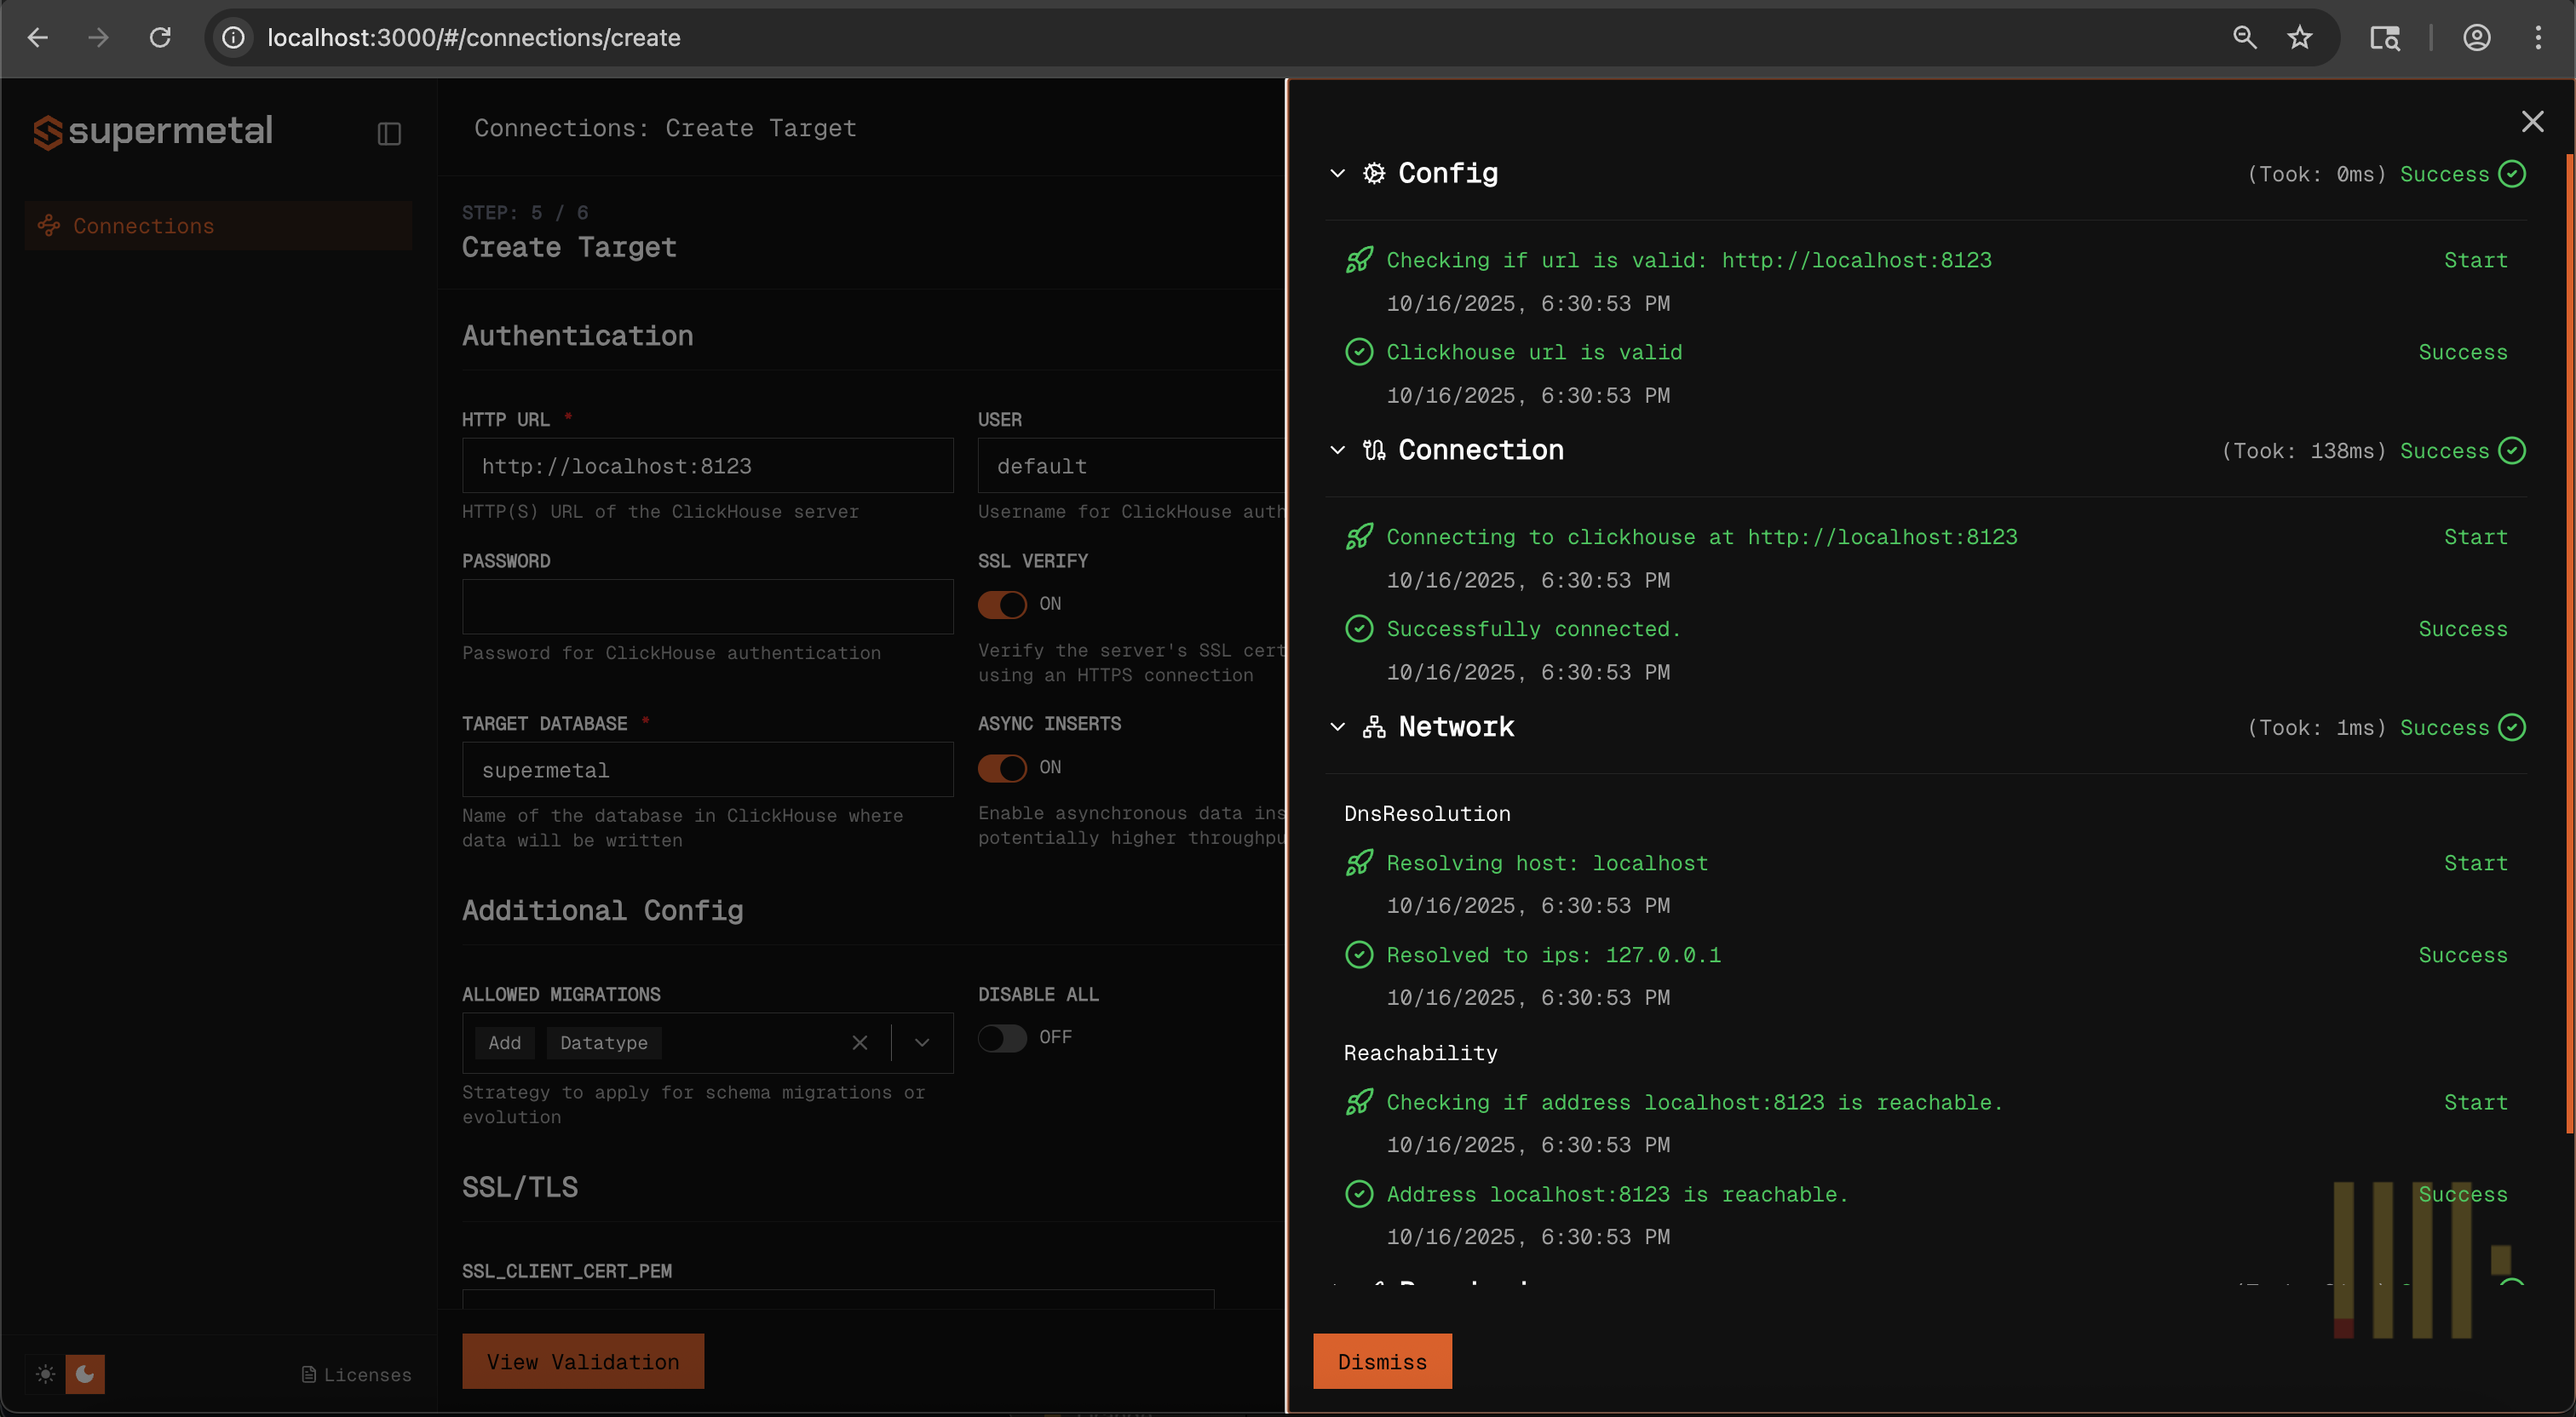
Connect the target
Select the target database or warehouse.
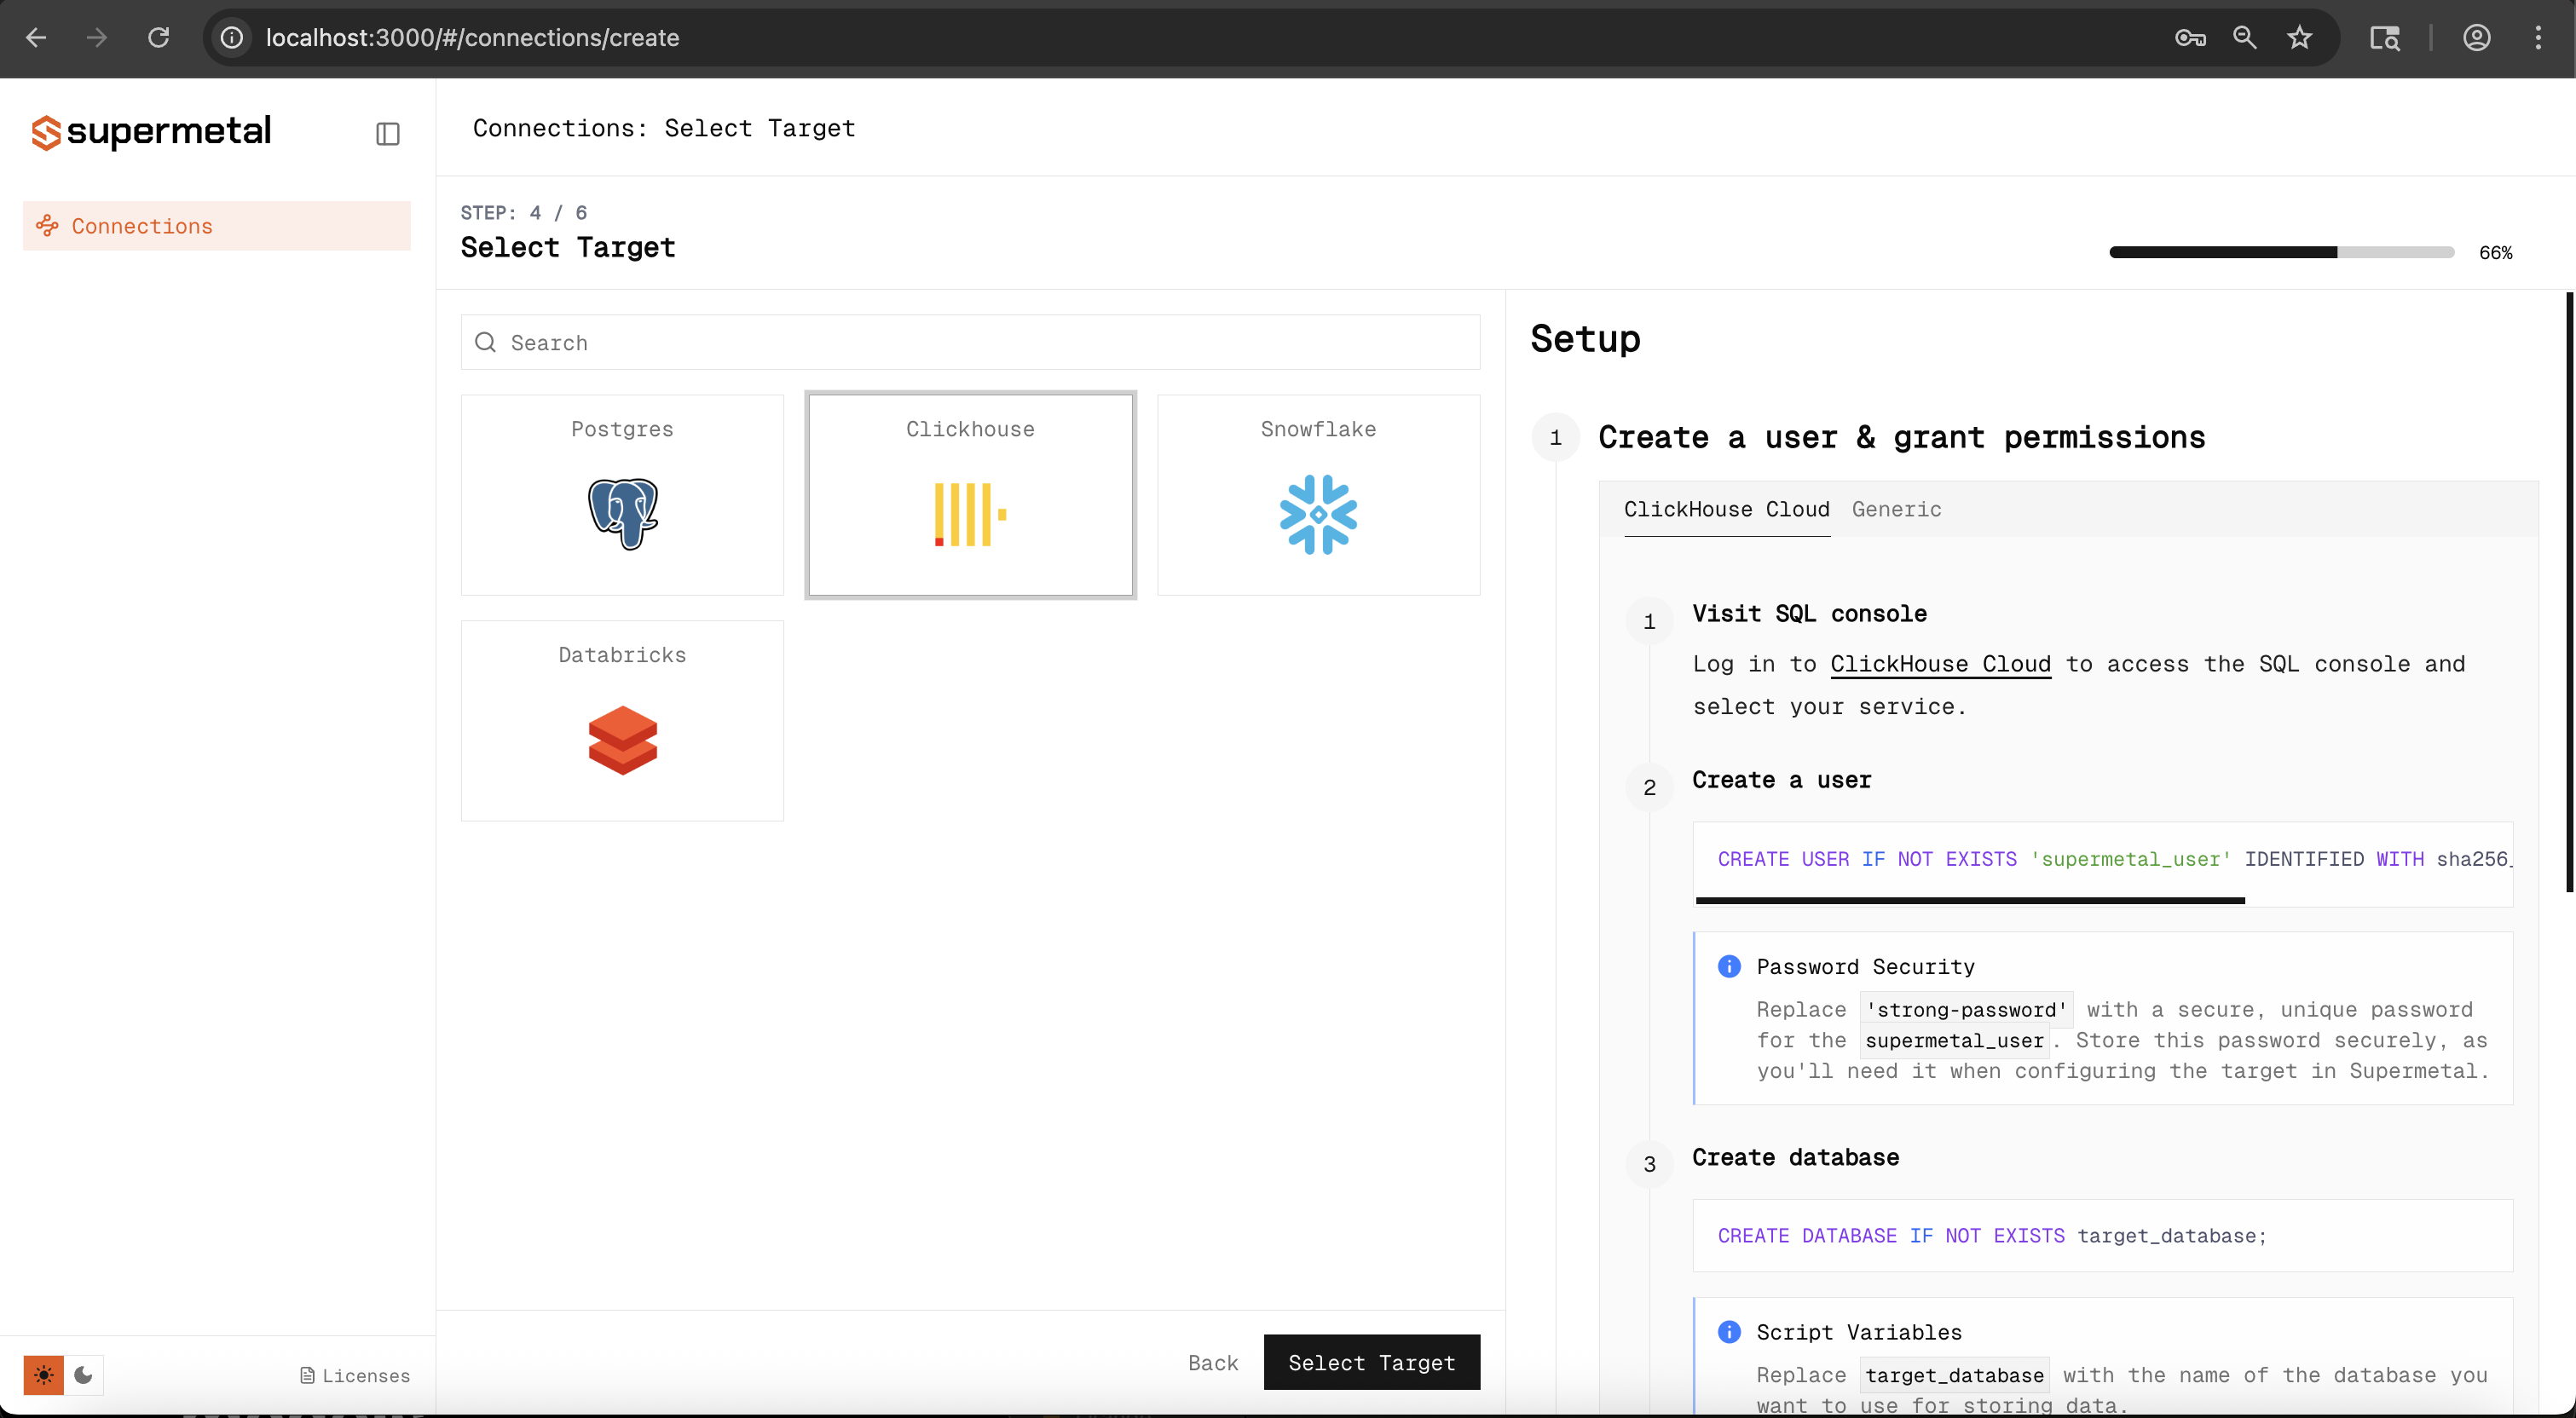
Enter the connection details. The fields vary by target type.
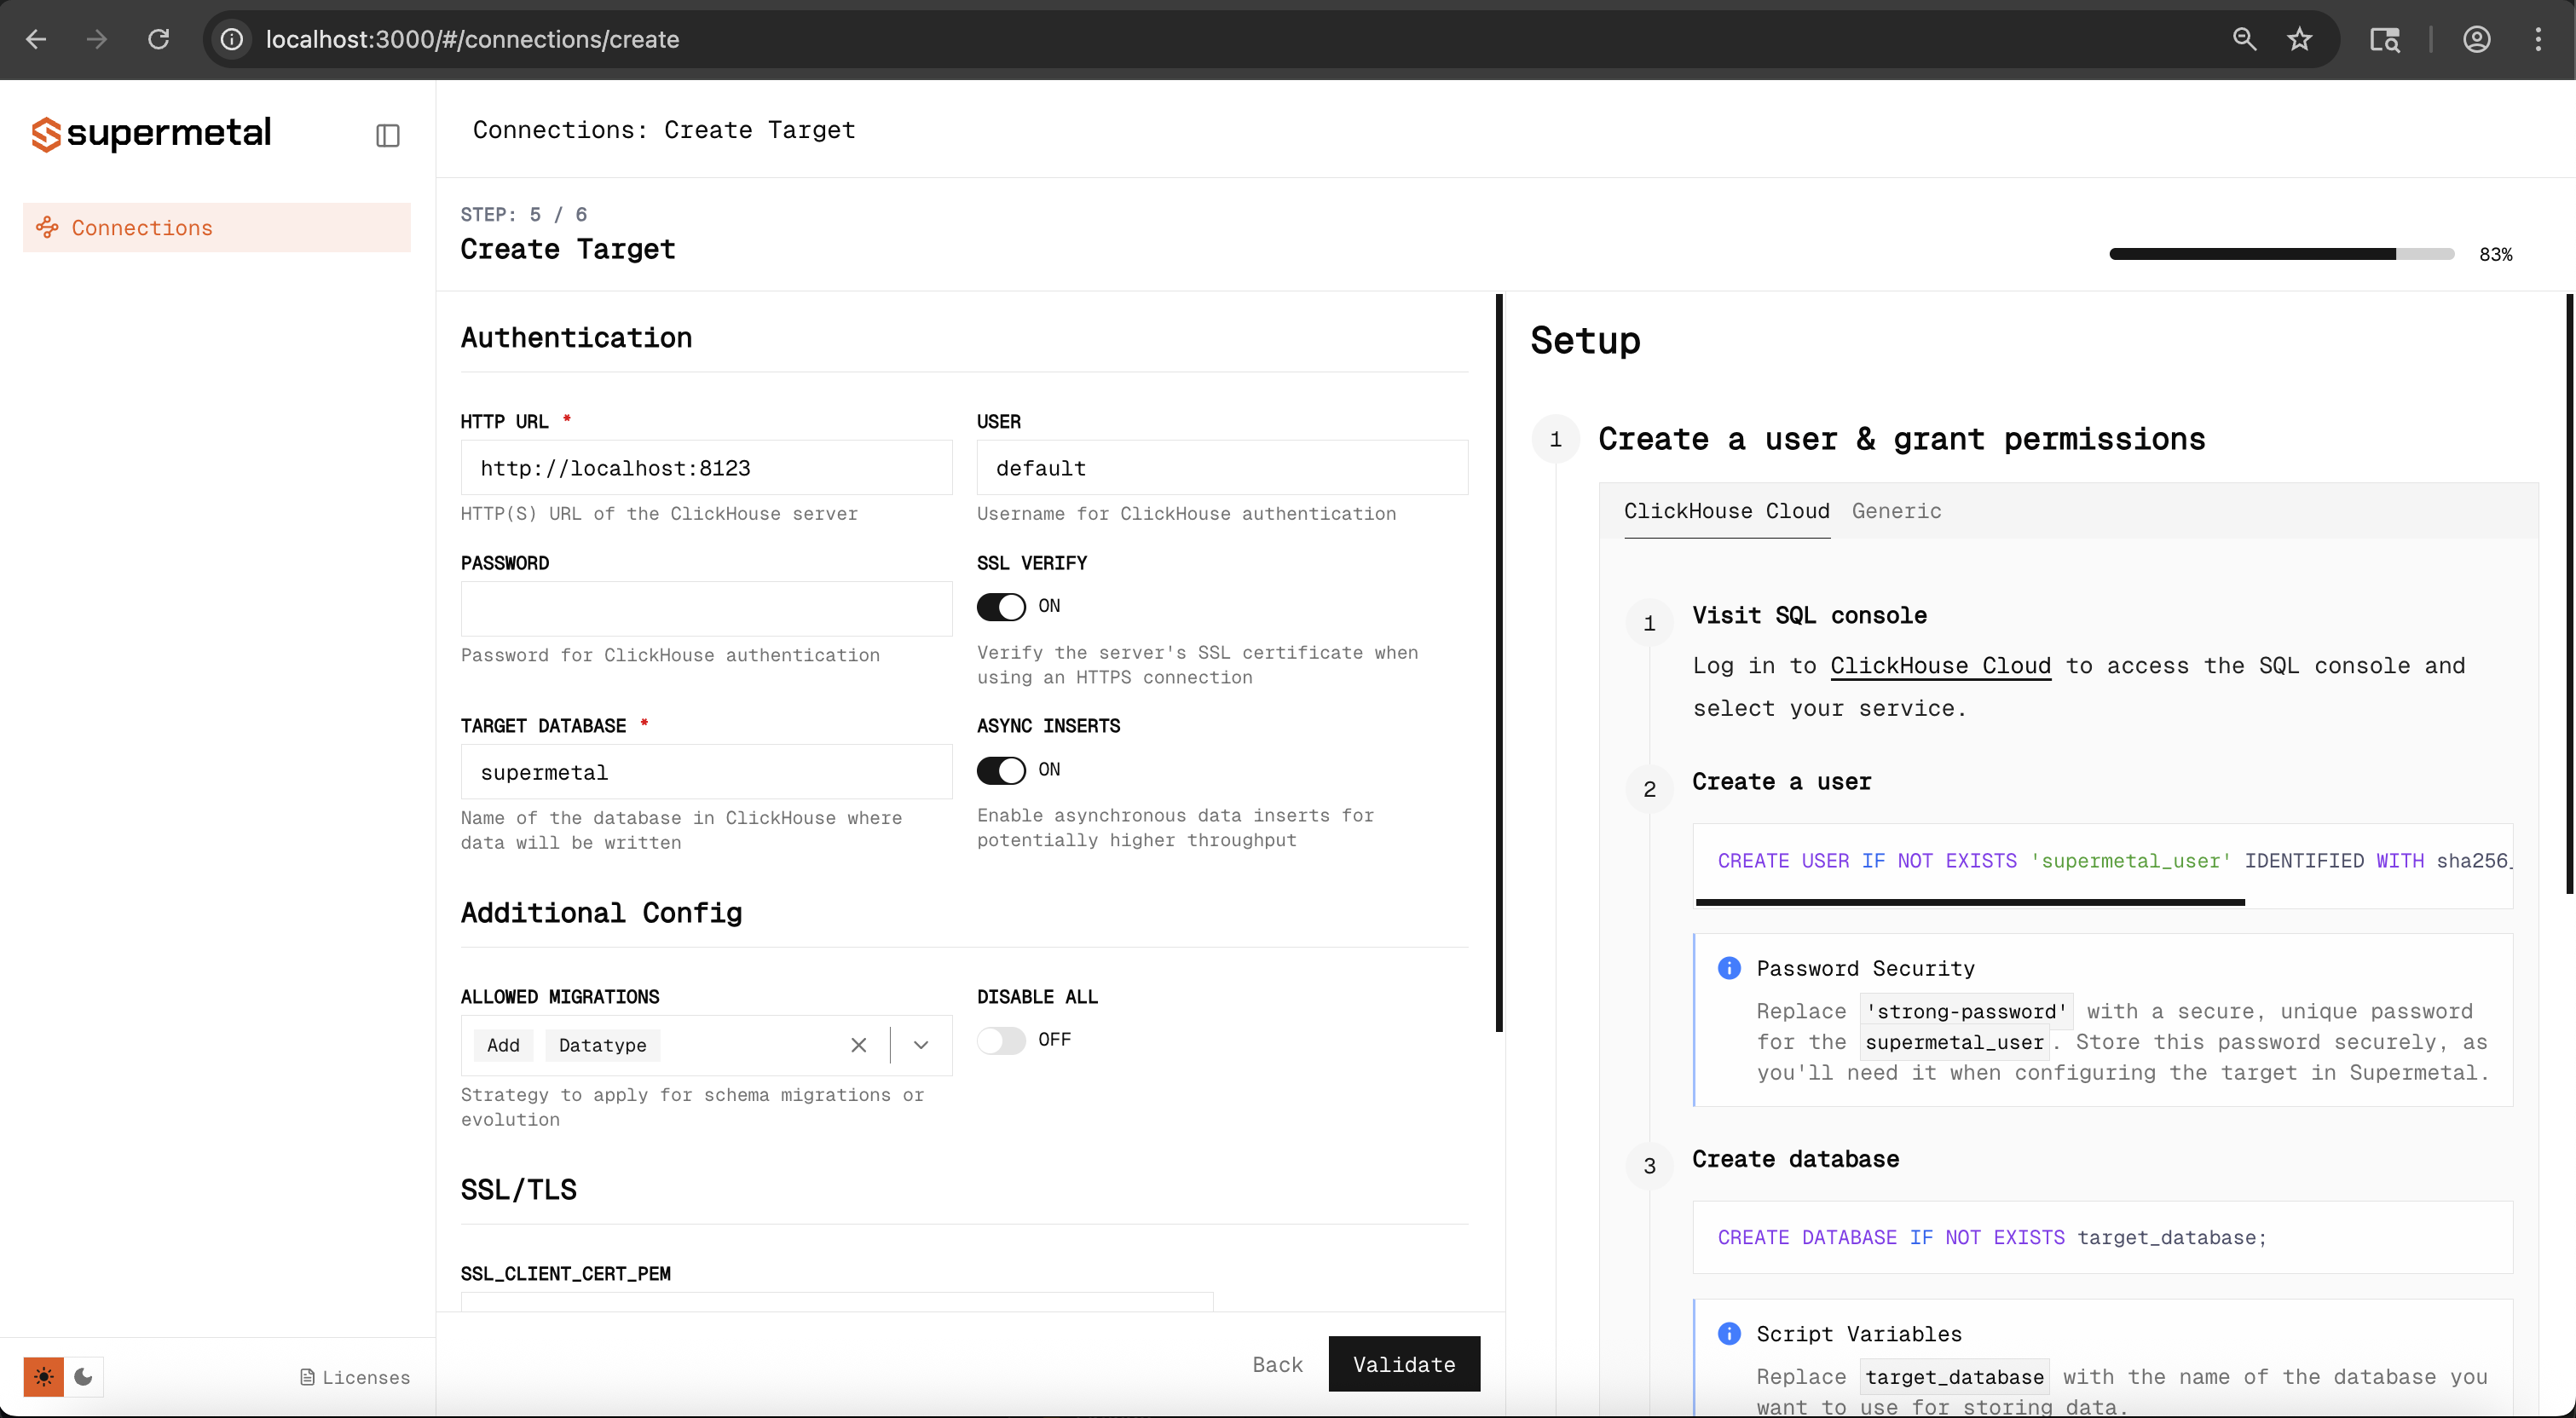
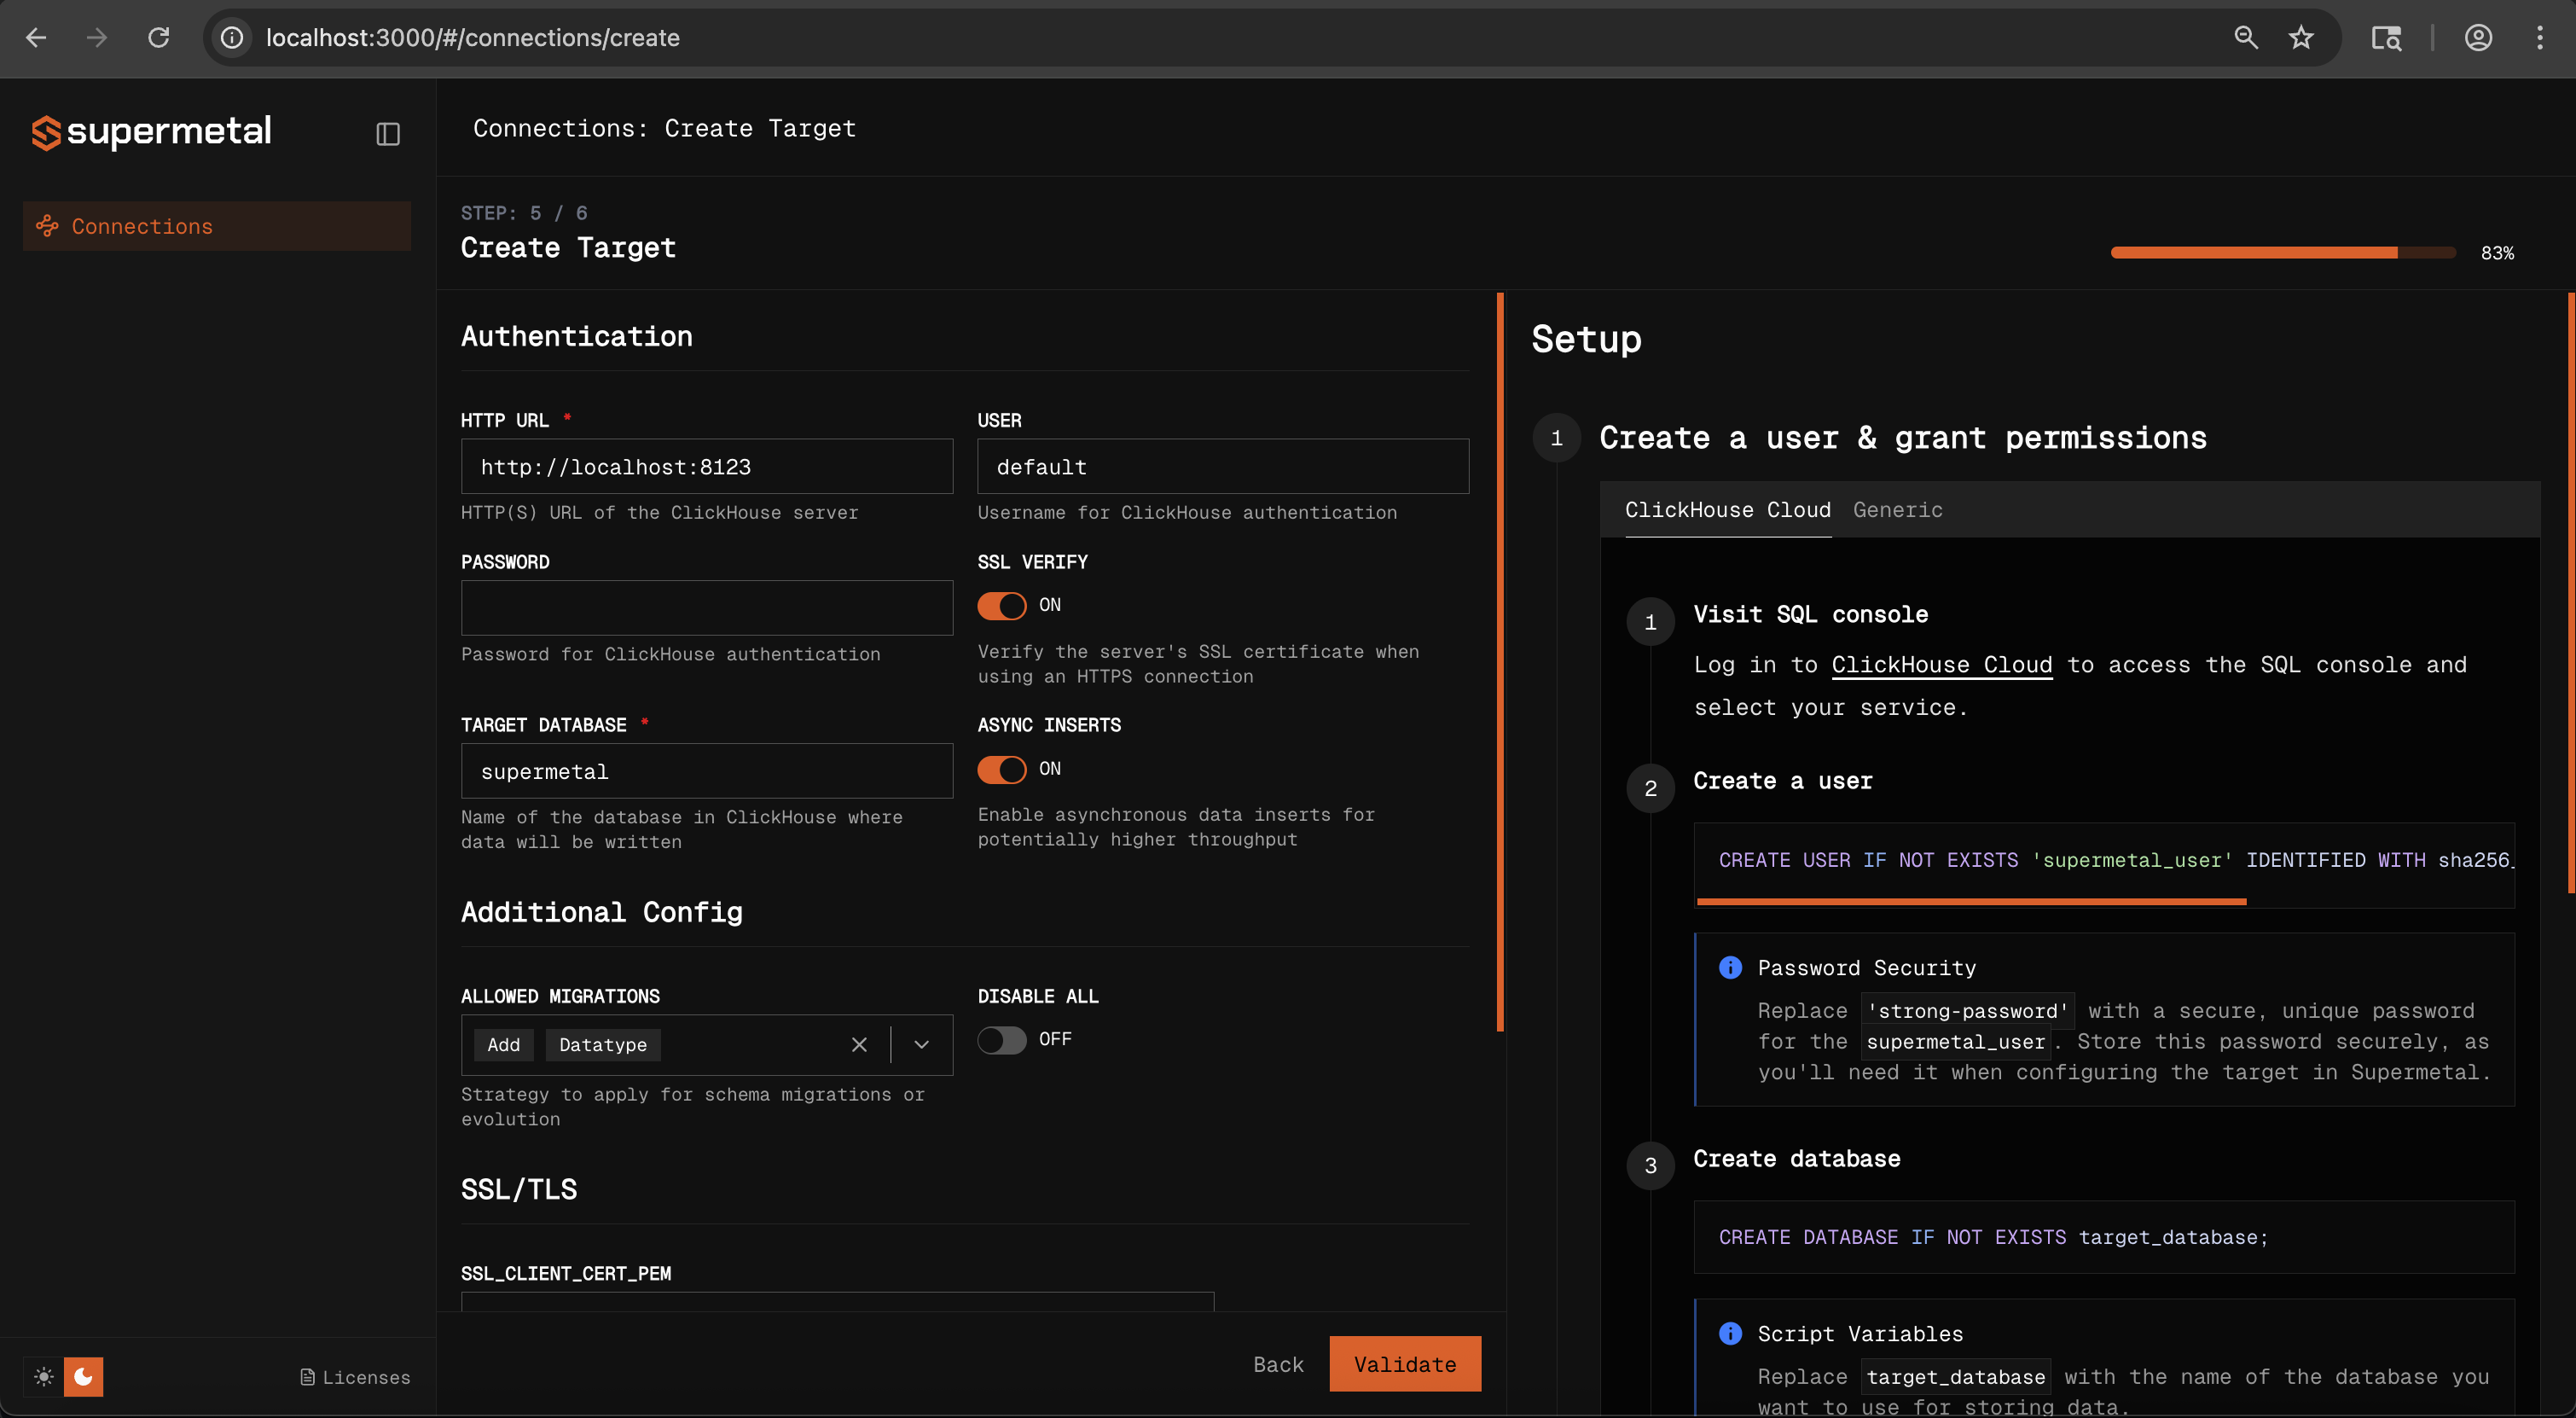
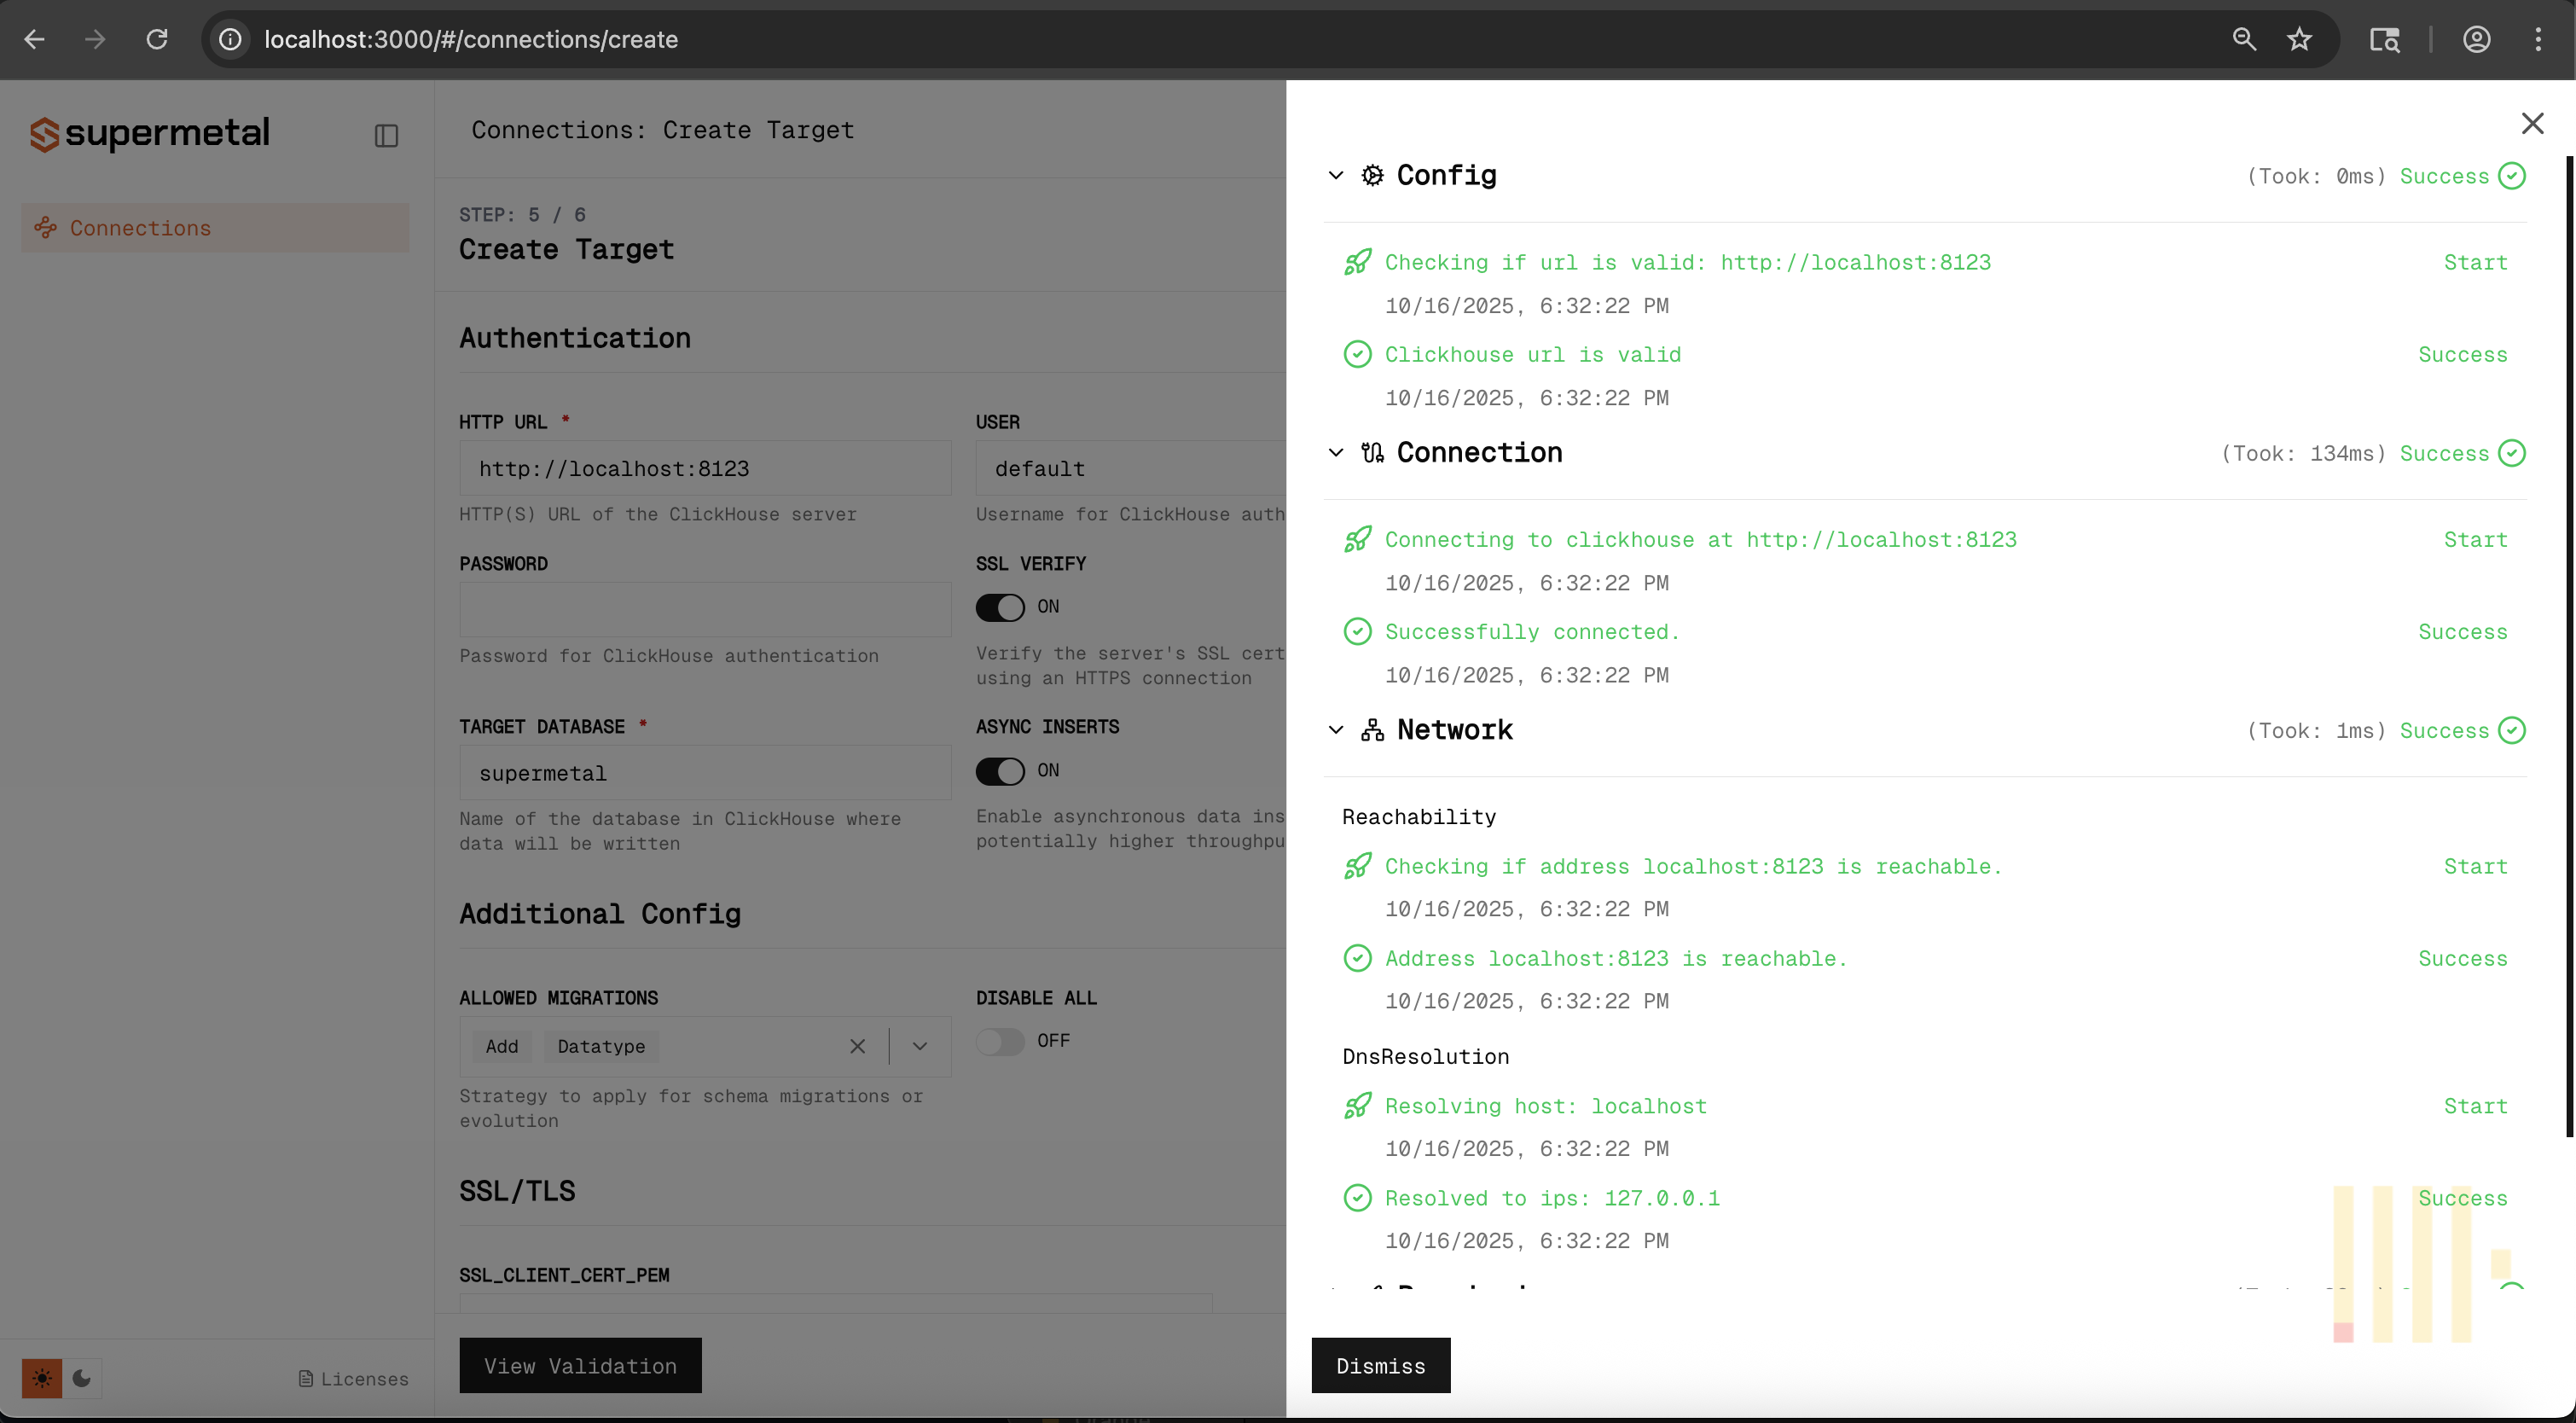
Validate. Supermetal verifies it can write to the target.
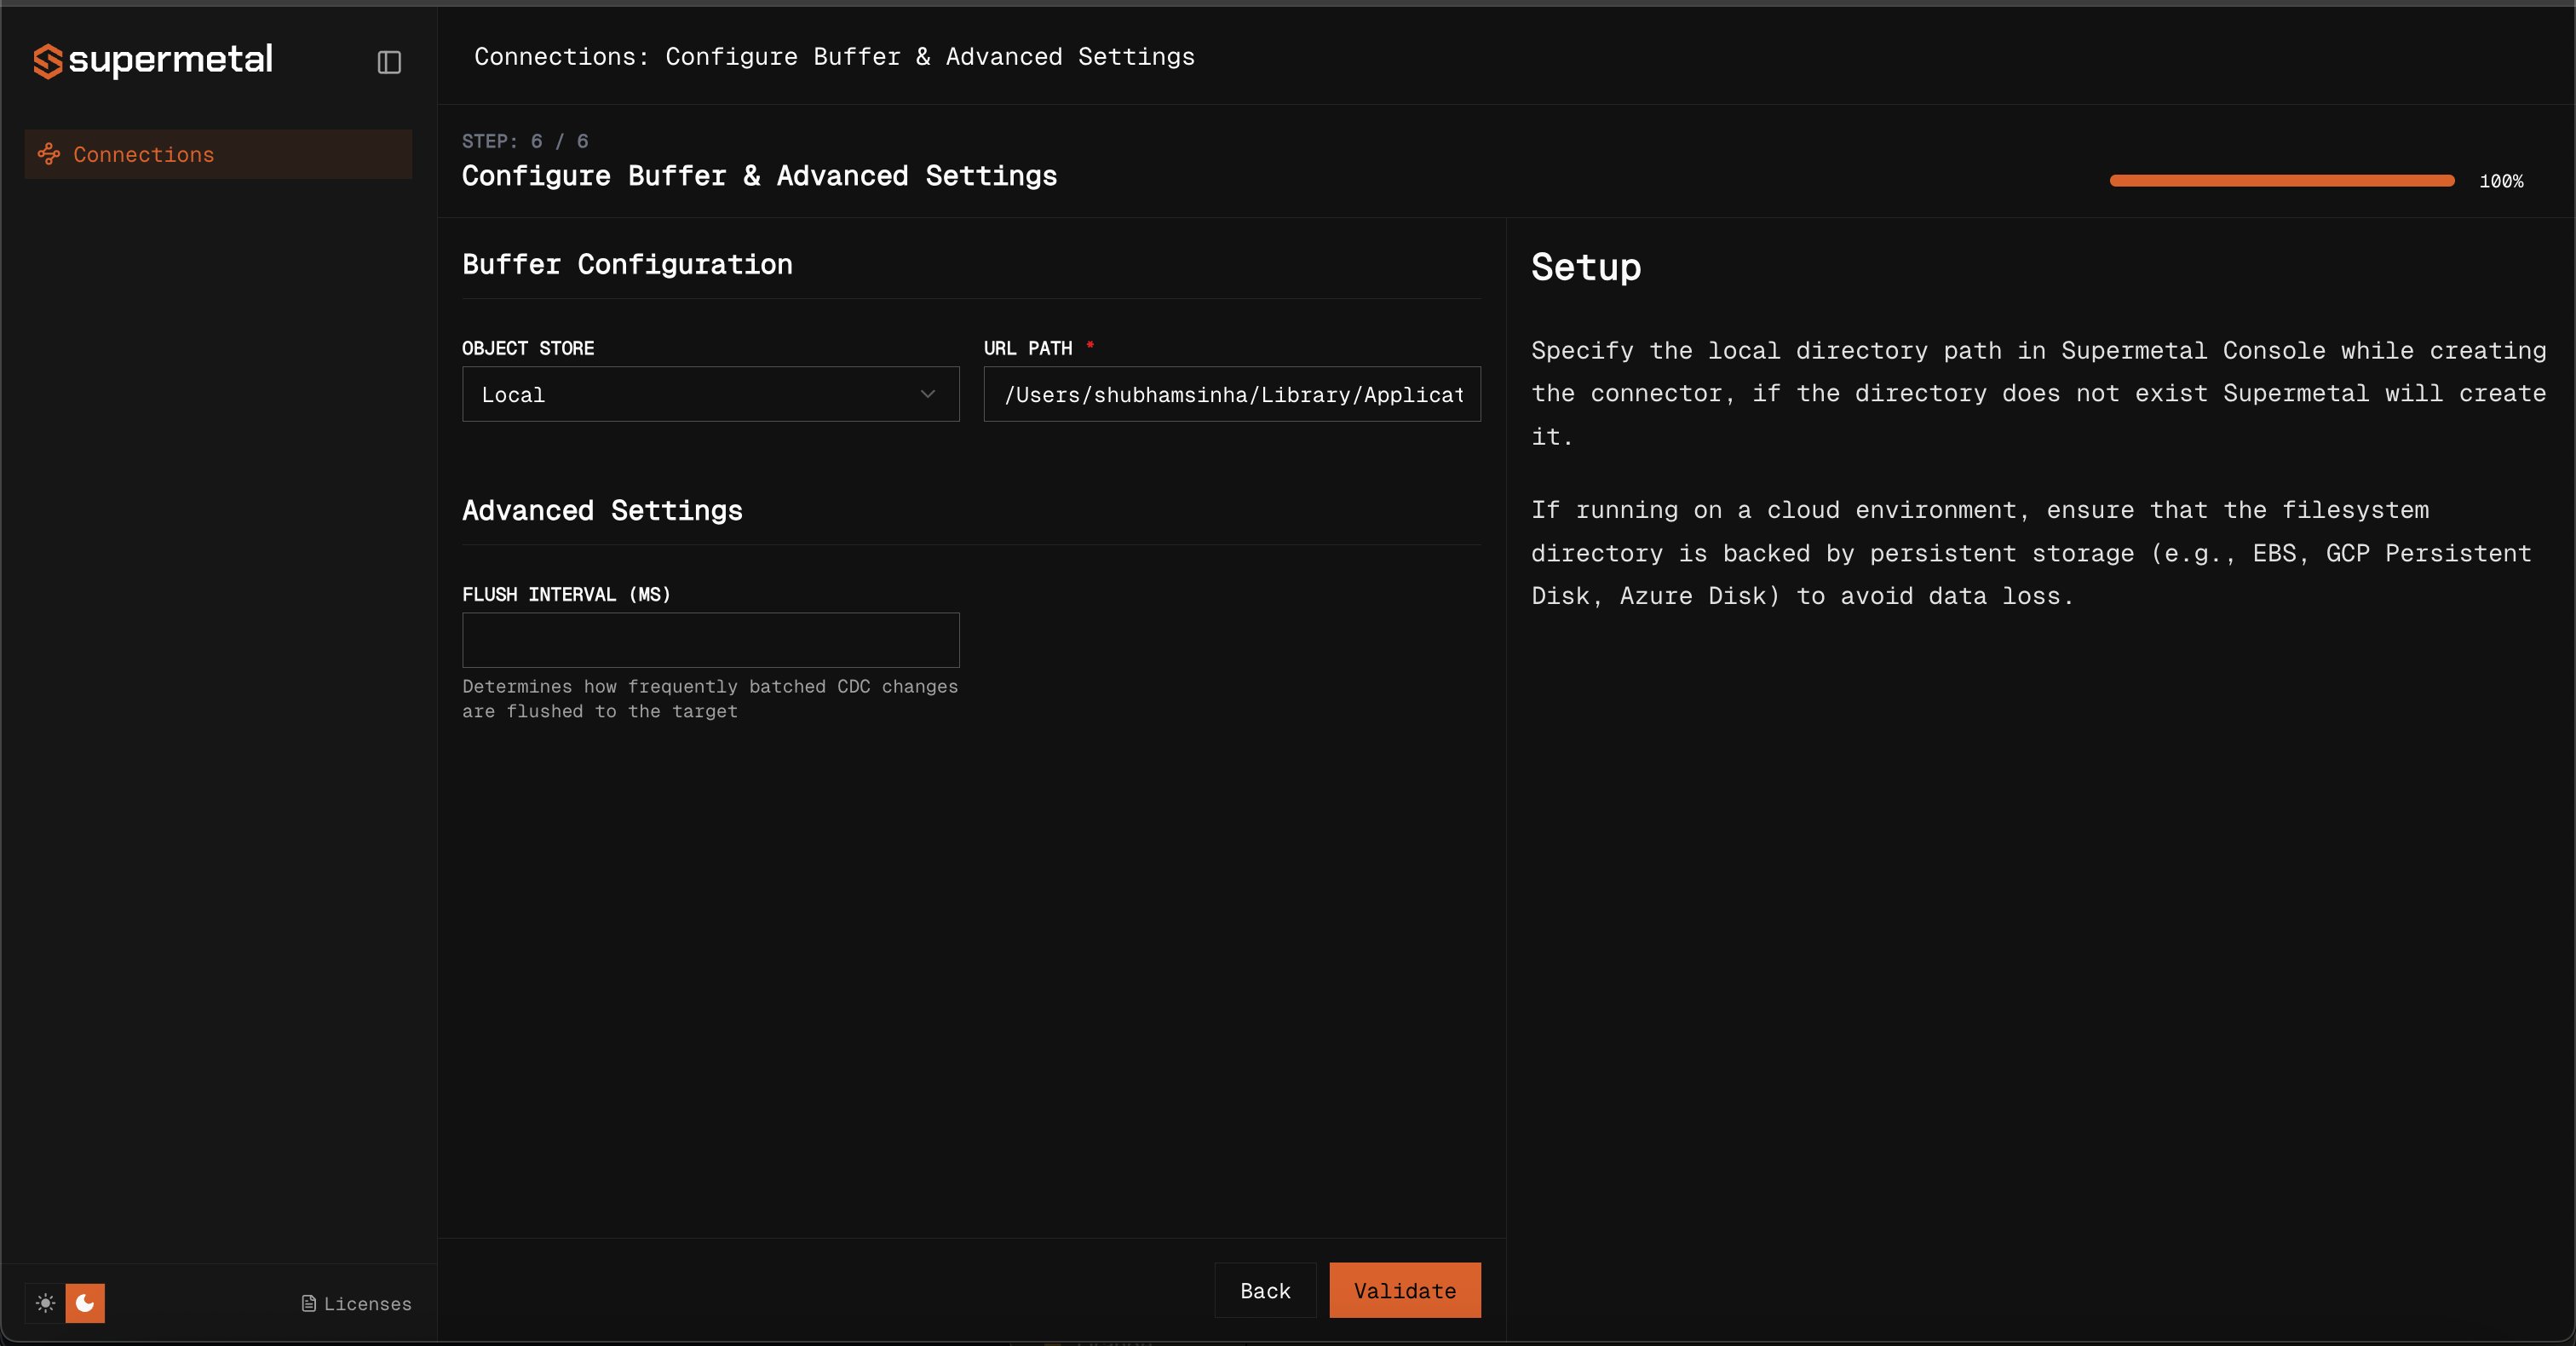
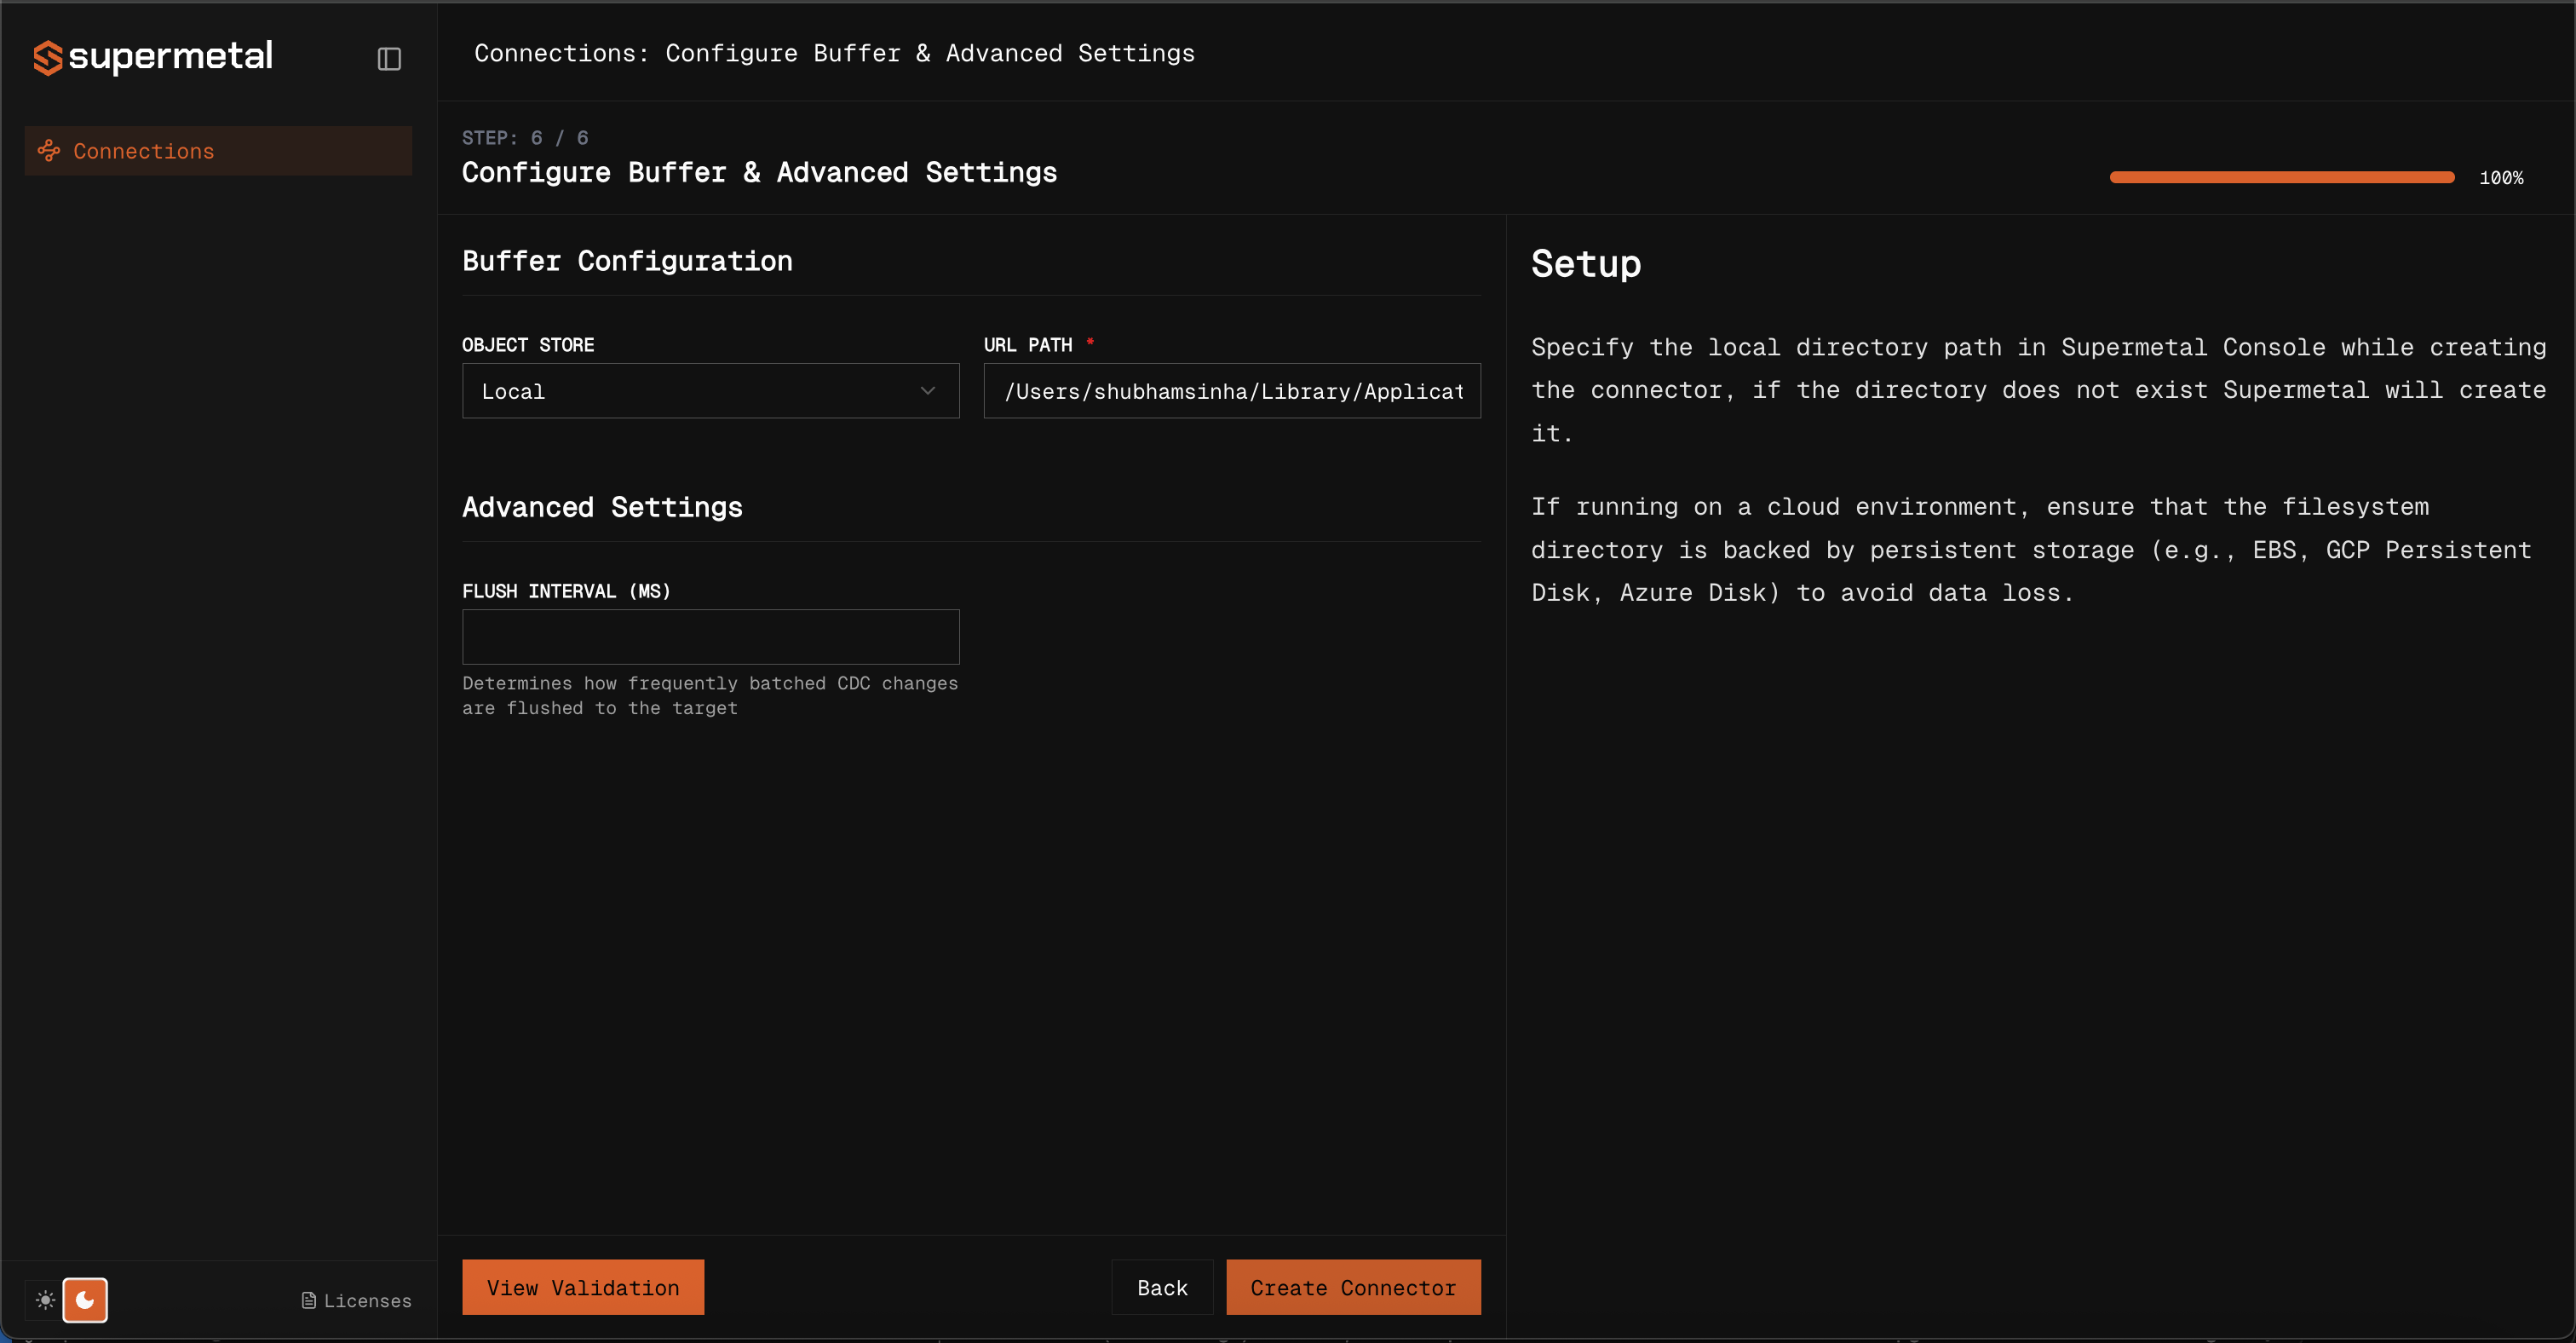
Configure the buffer and advanced settings (optional)
Choose where Supermetal stages data between source and target. Local, with an absolute file path, is the fastest way to start. Object storage (S3, Azure Blob) is recommended for production. Under advanced settings, flush_interval_ms controls how often changes flush to the target.

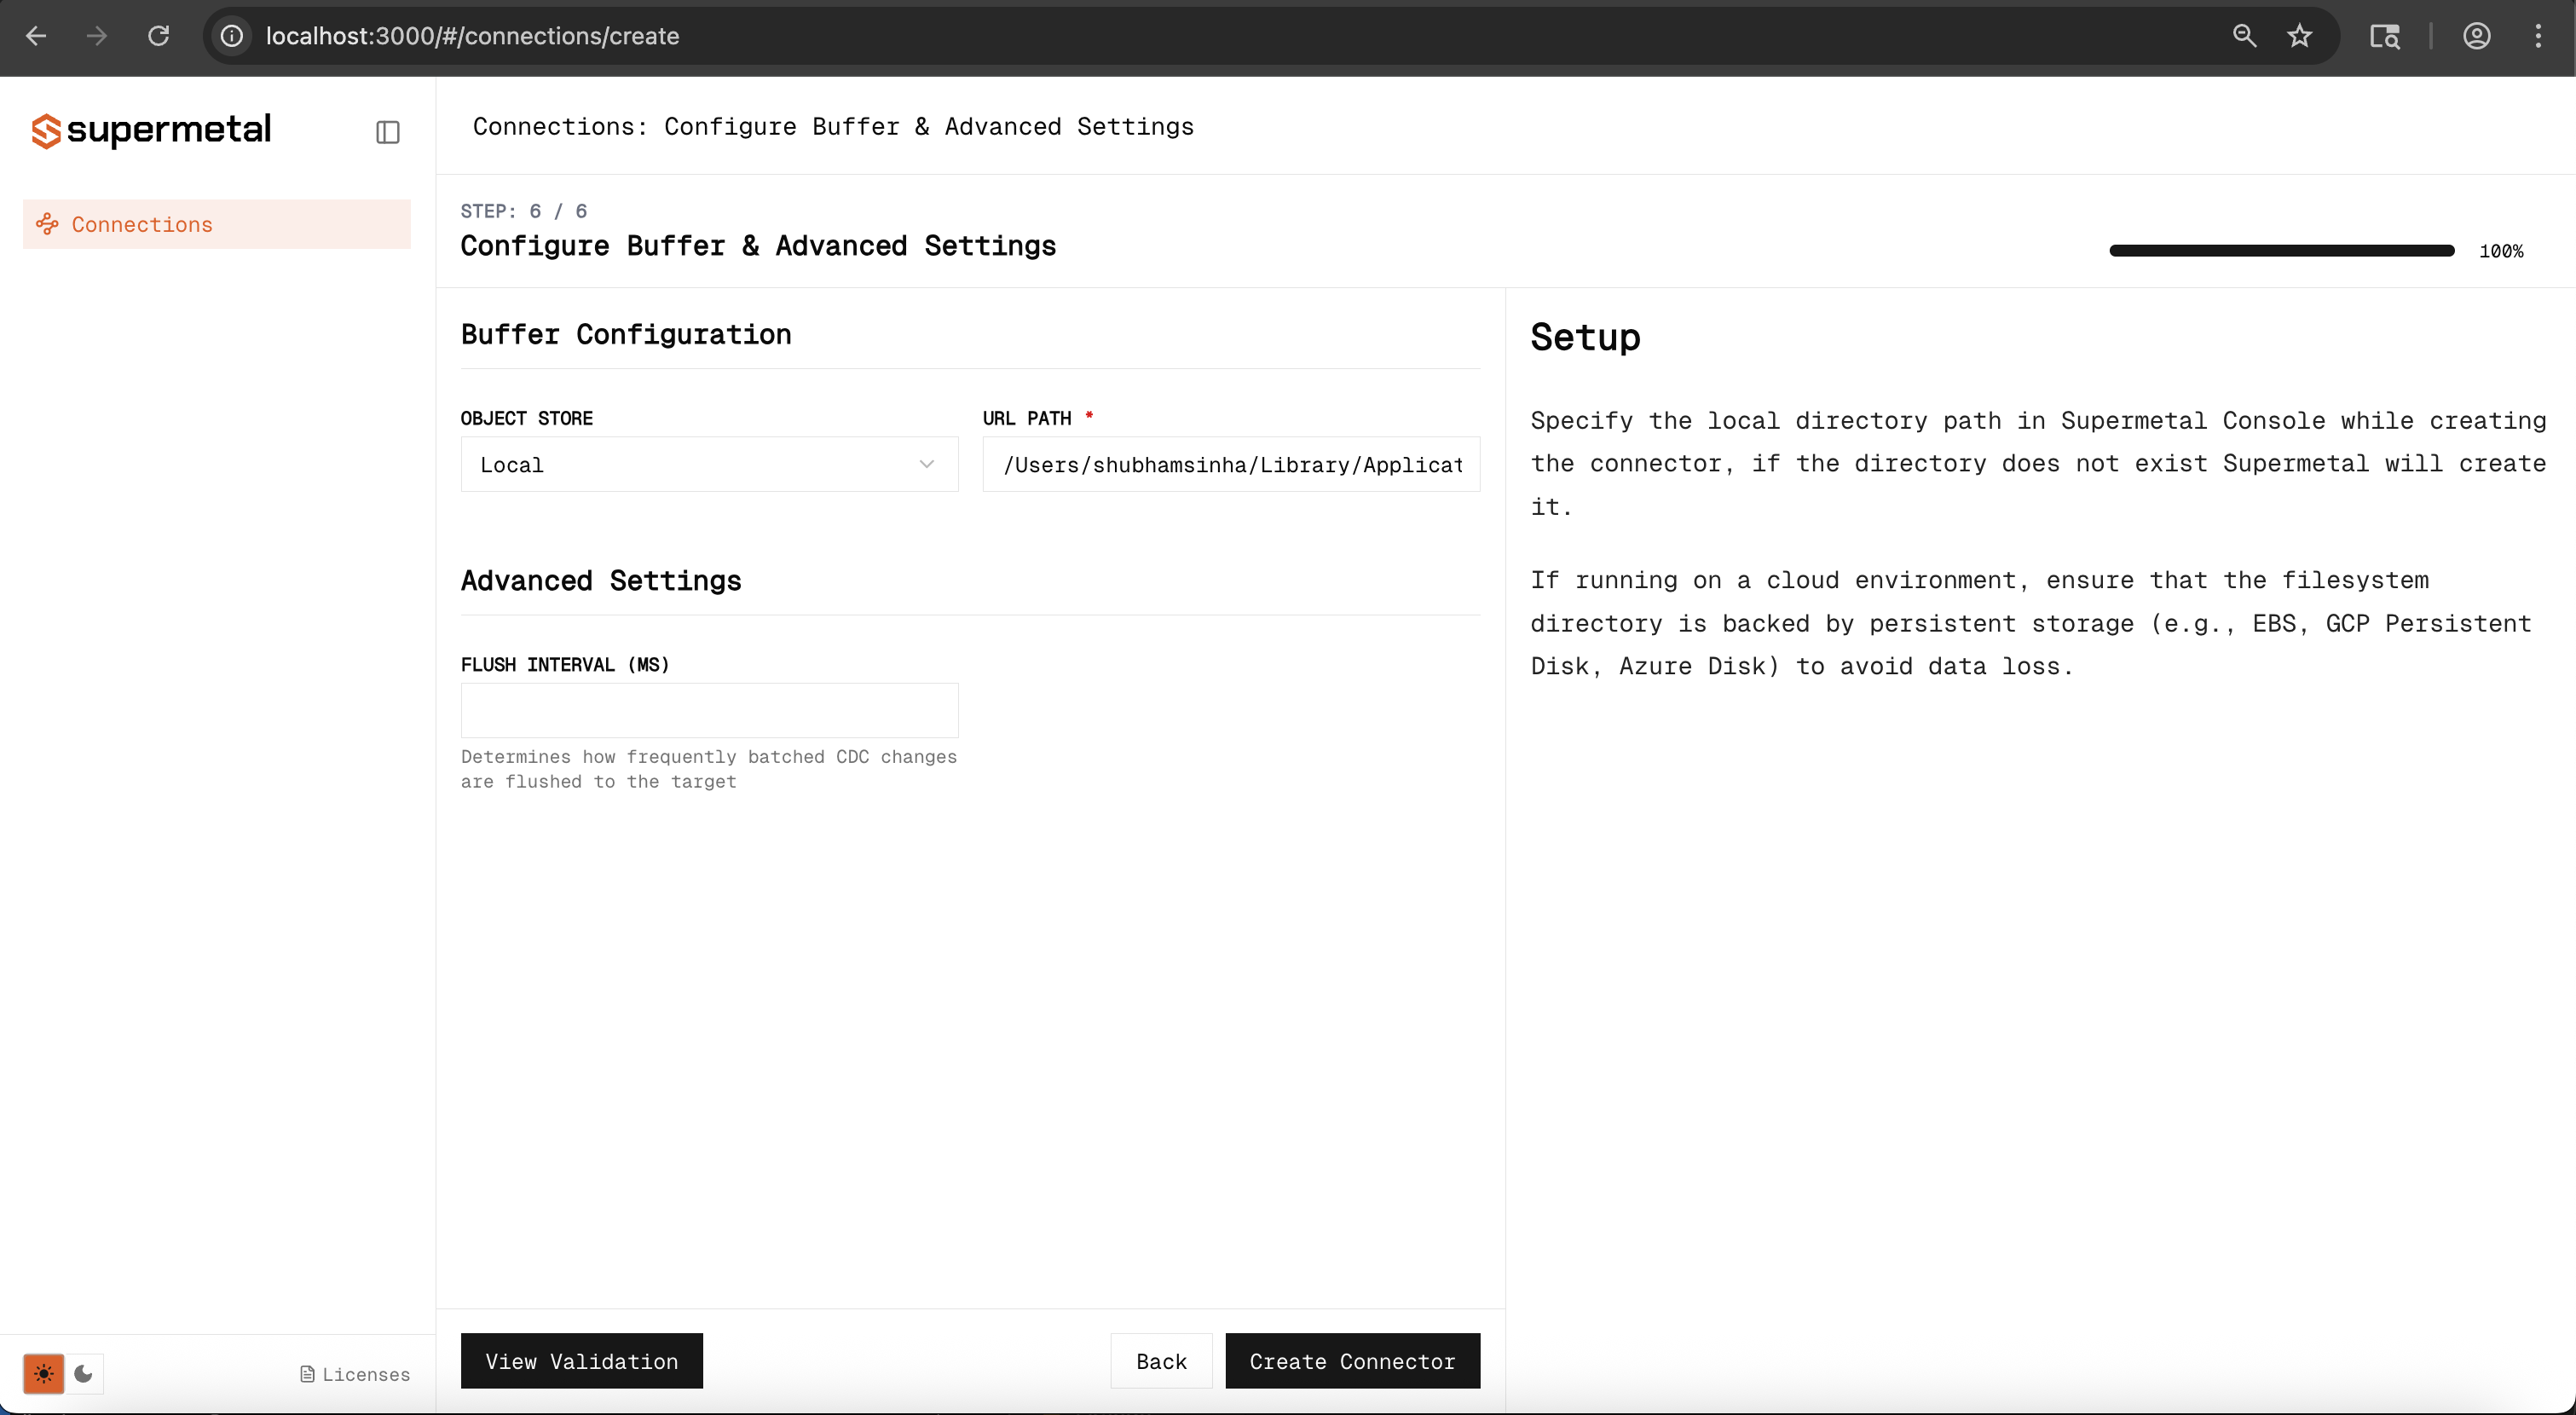
Validate and create
Click Validate to check permissions on the configured buffer.

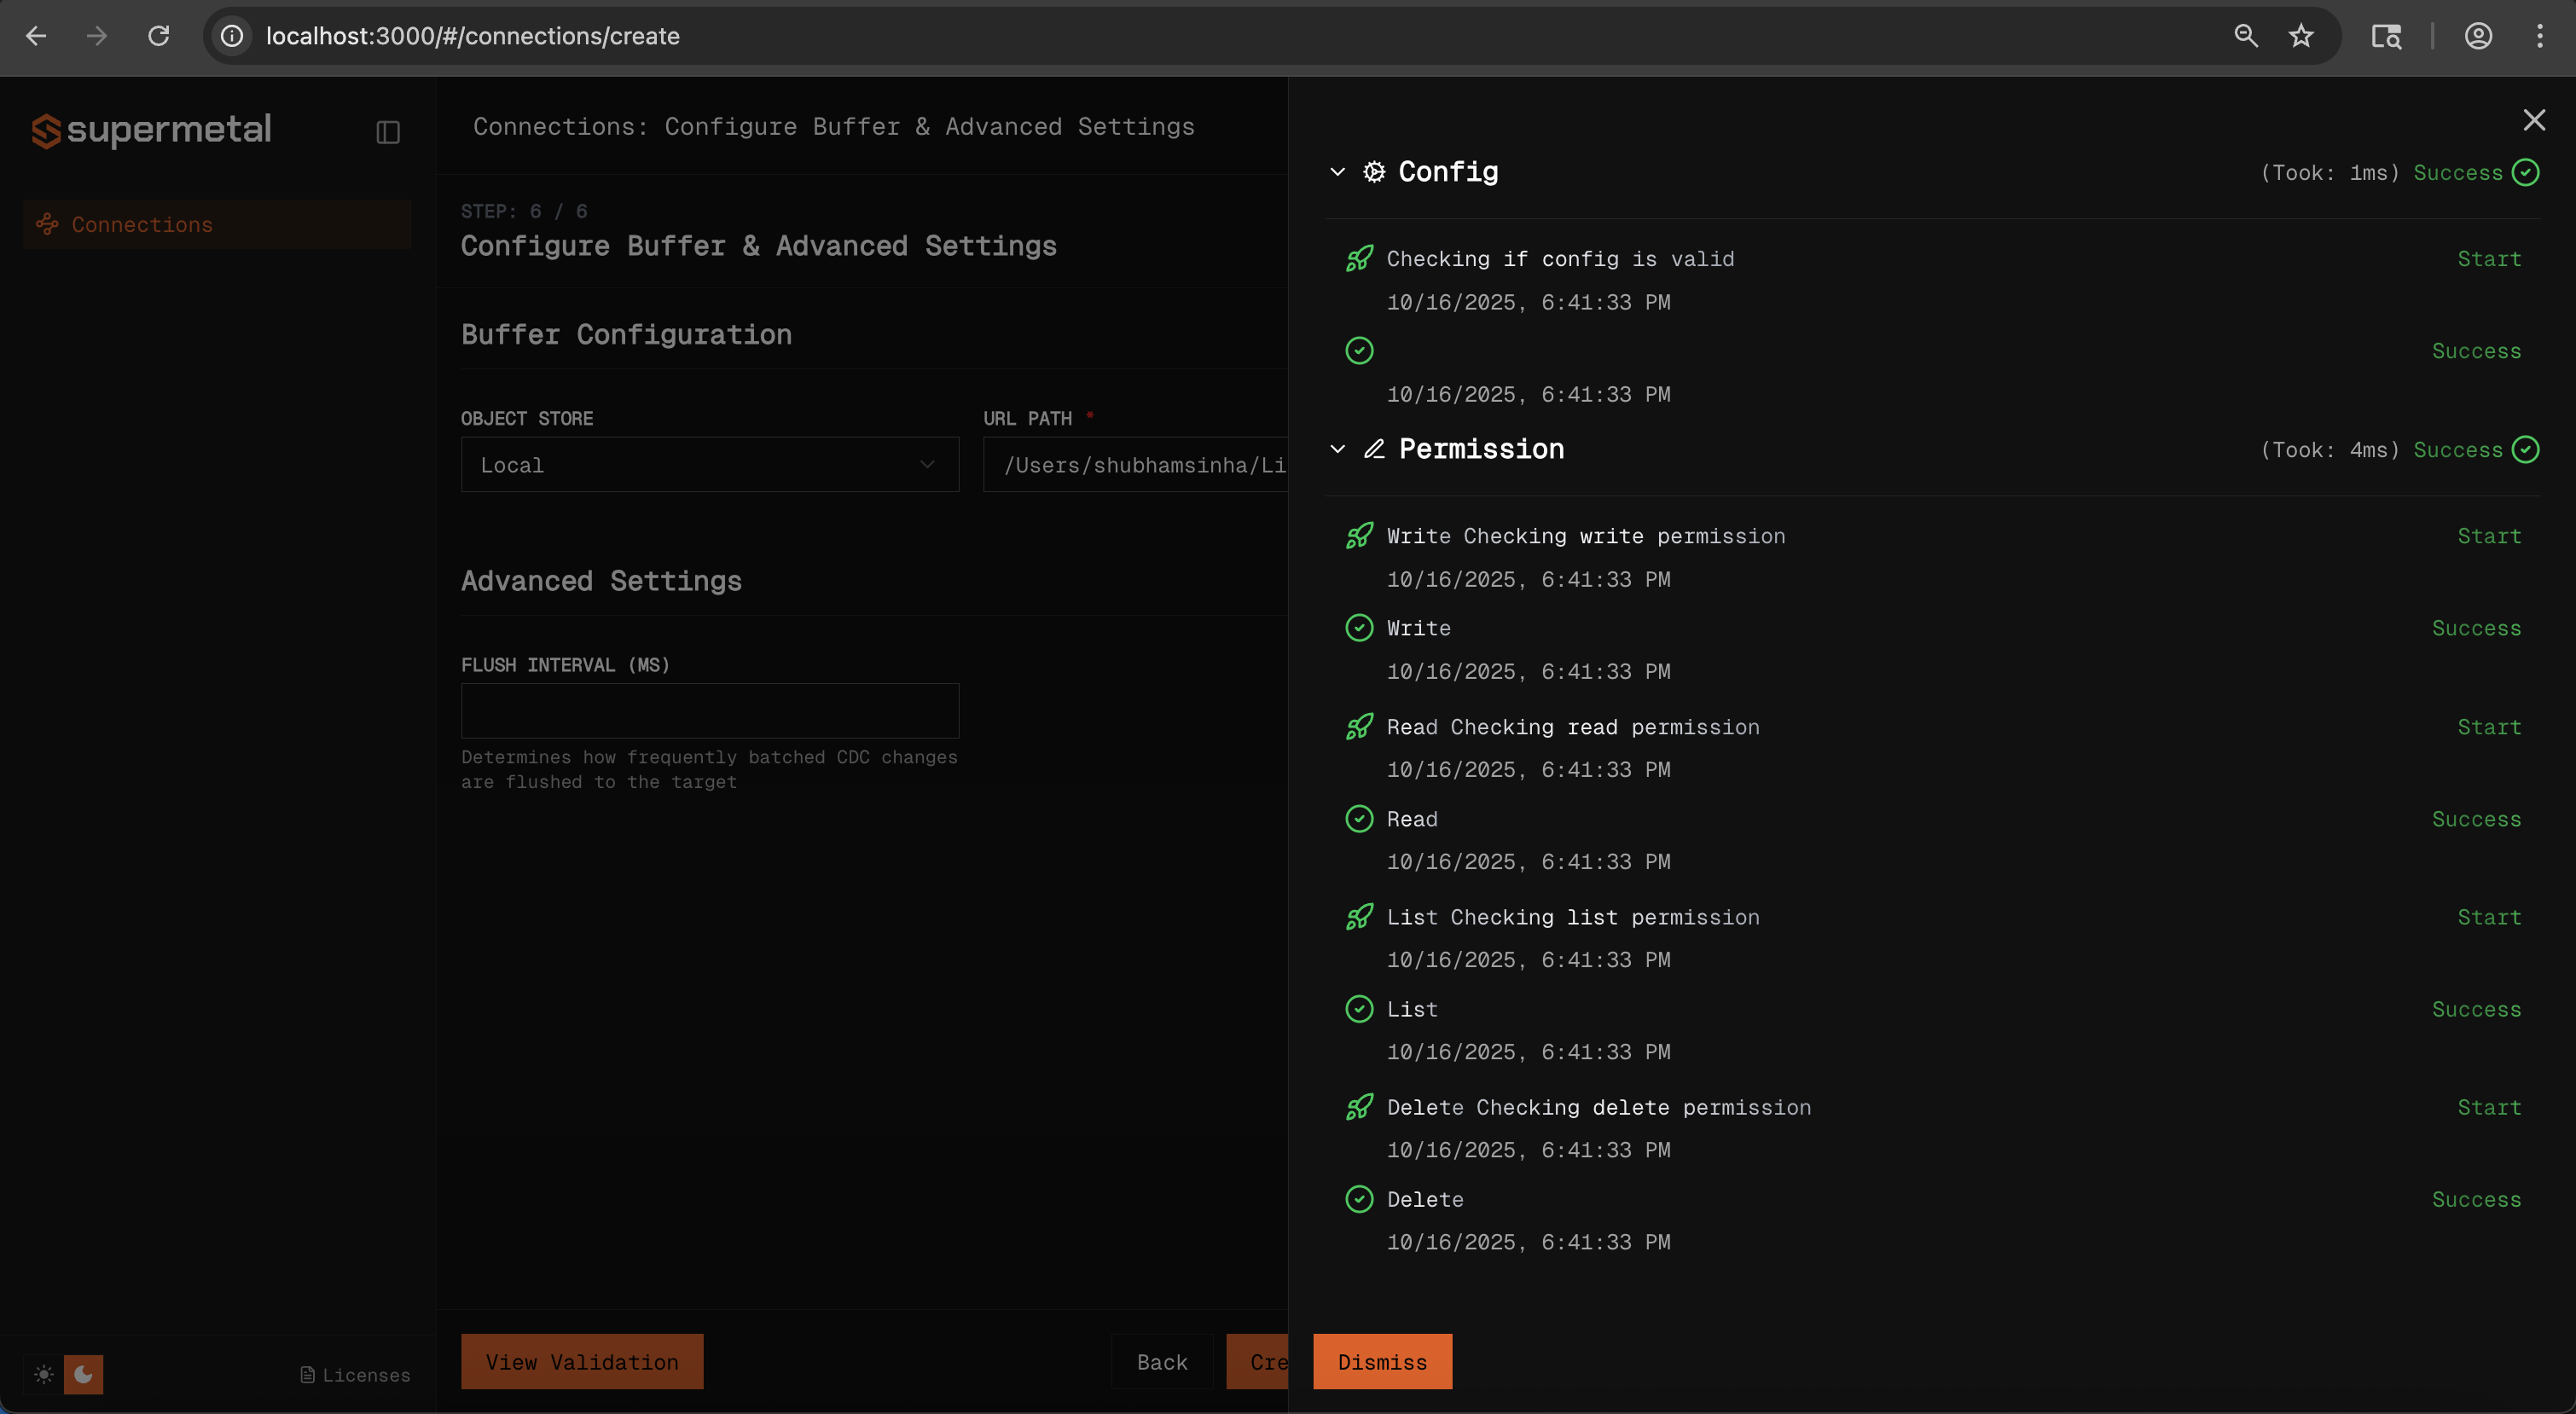
Click Create Connector to start the sync.
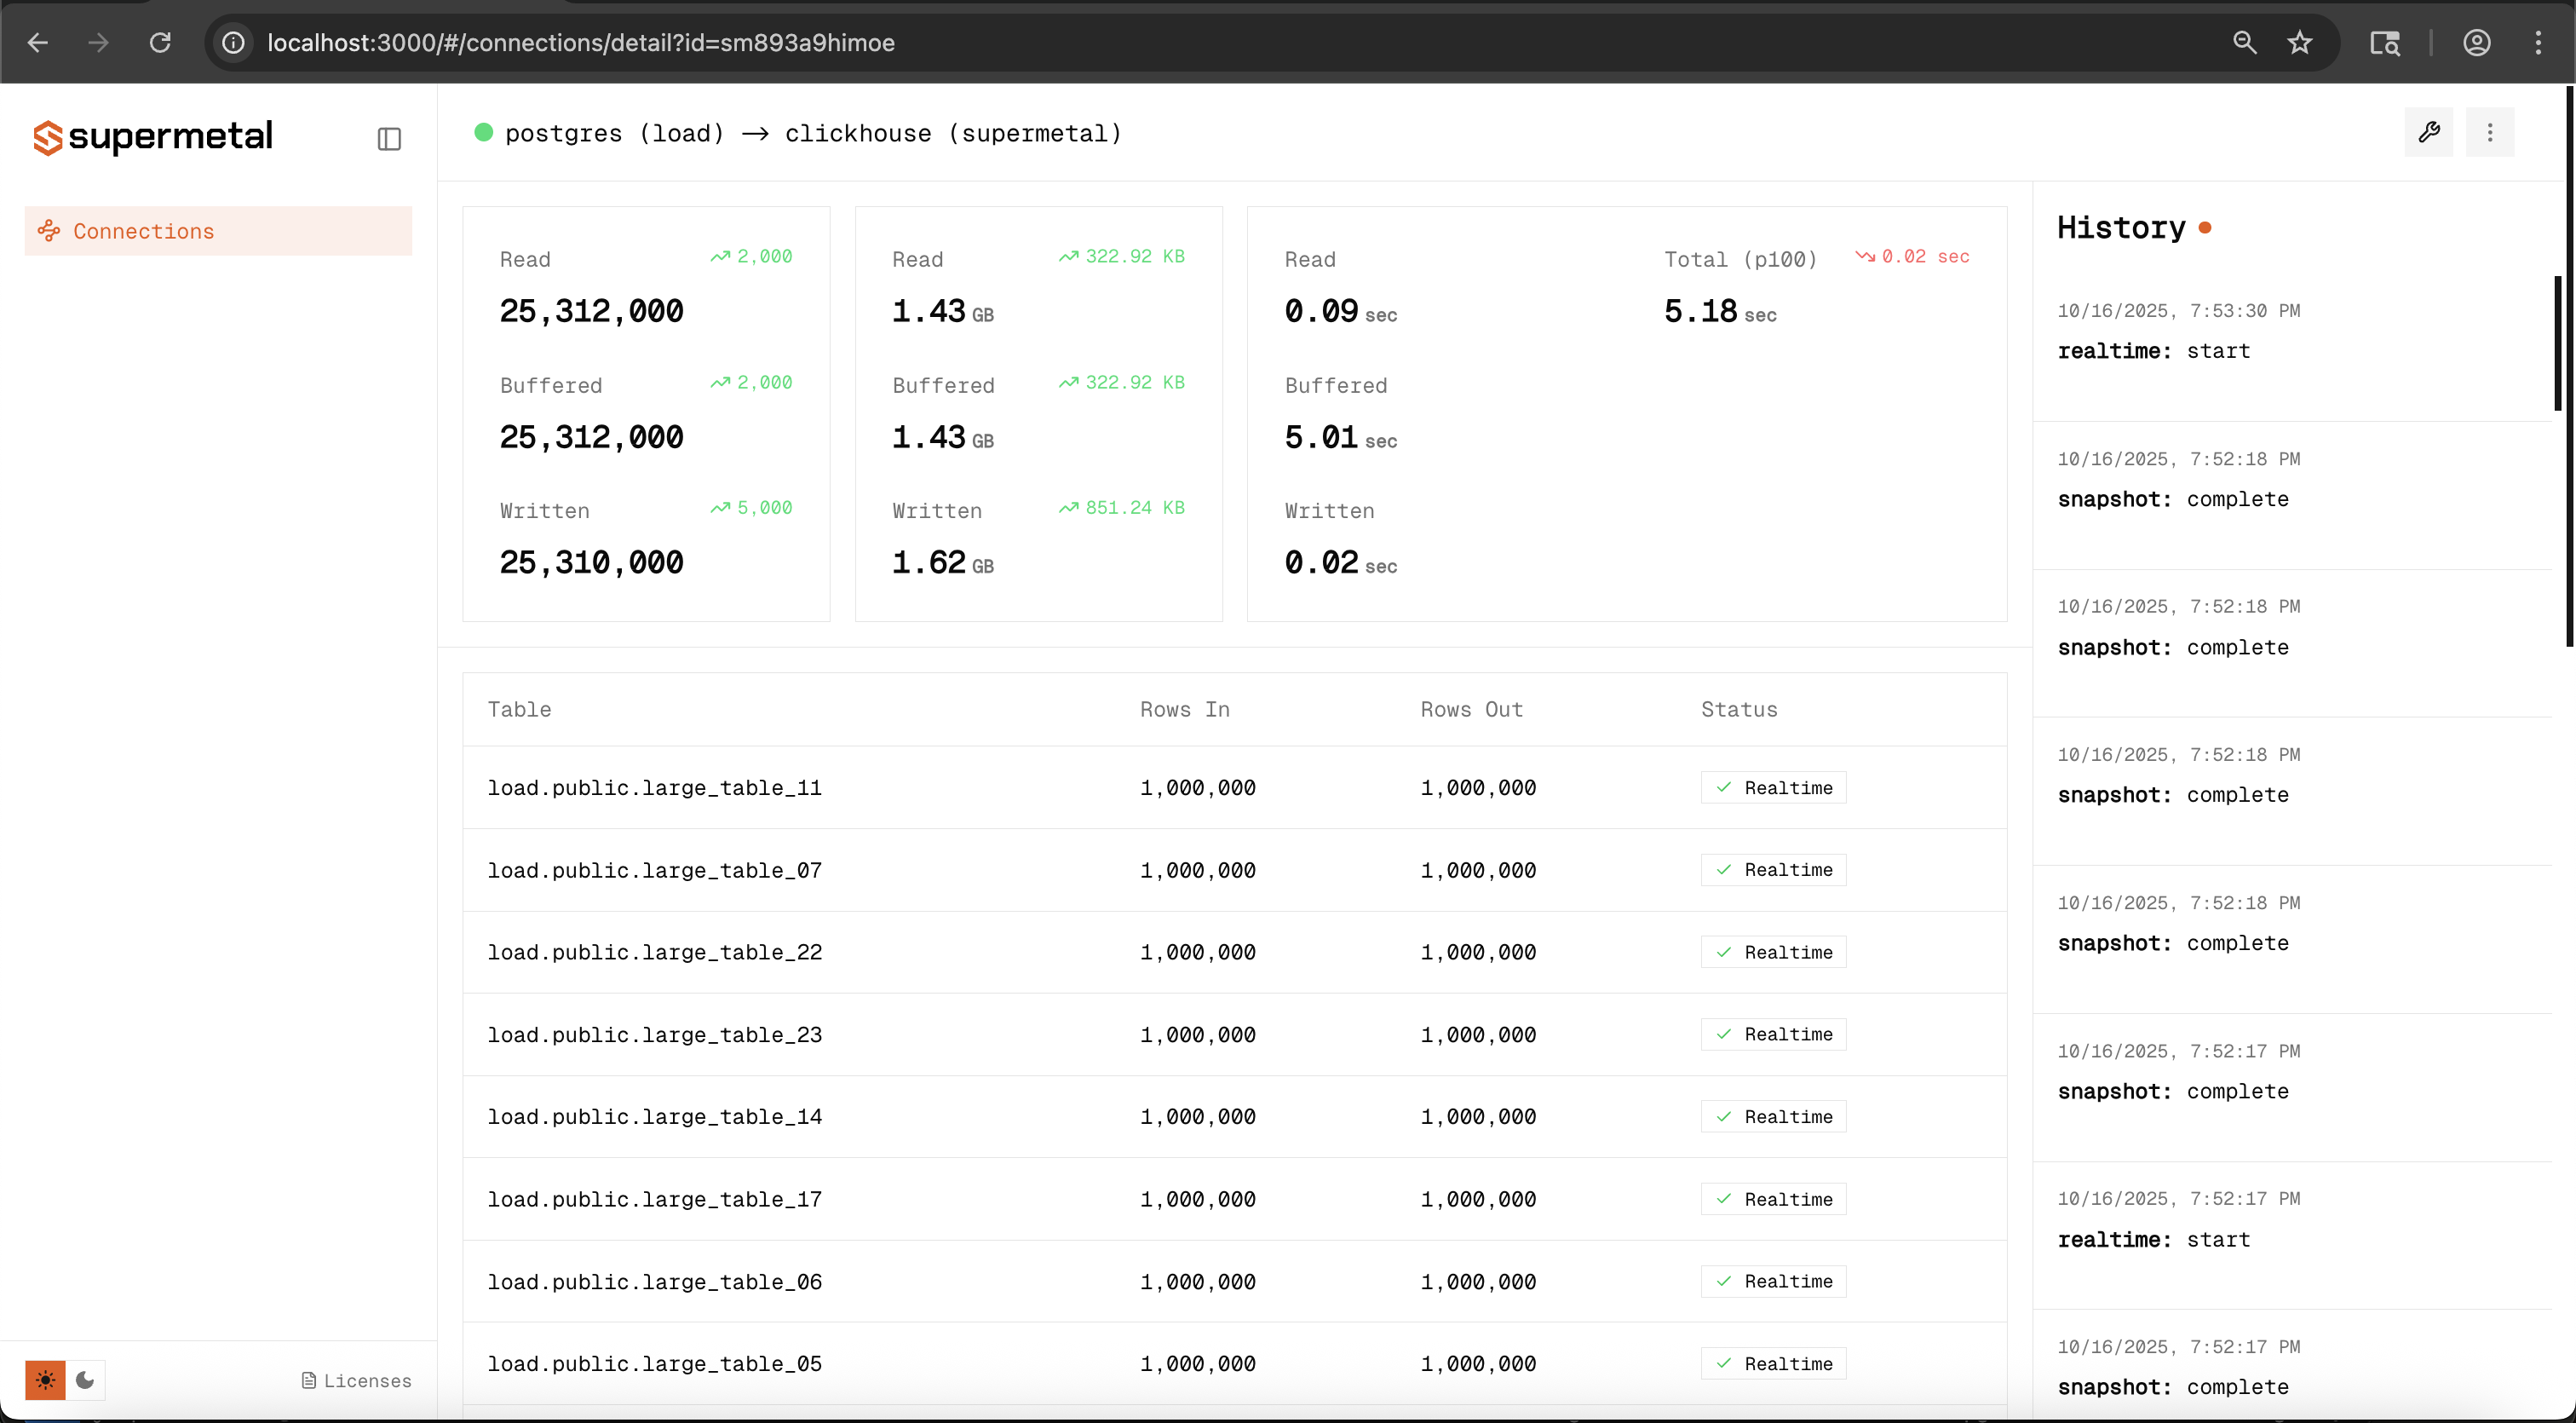
Monitor the connector
The connector begins replicating immediately. The dashboard shows its replication status and sync progress, and lets you pause, resume, or edit it. Once the initial snapshot completes, the status changes to Realtime and the connector is streaming live changes.

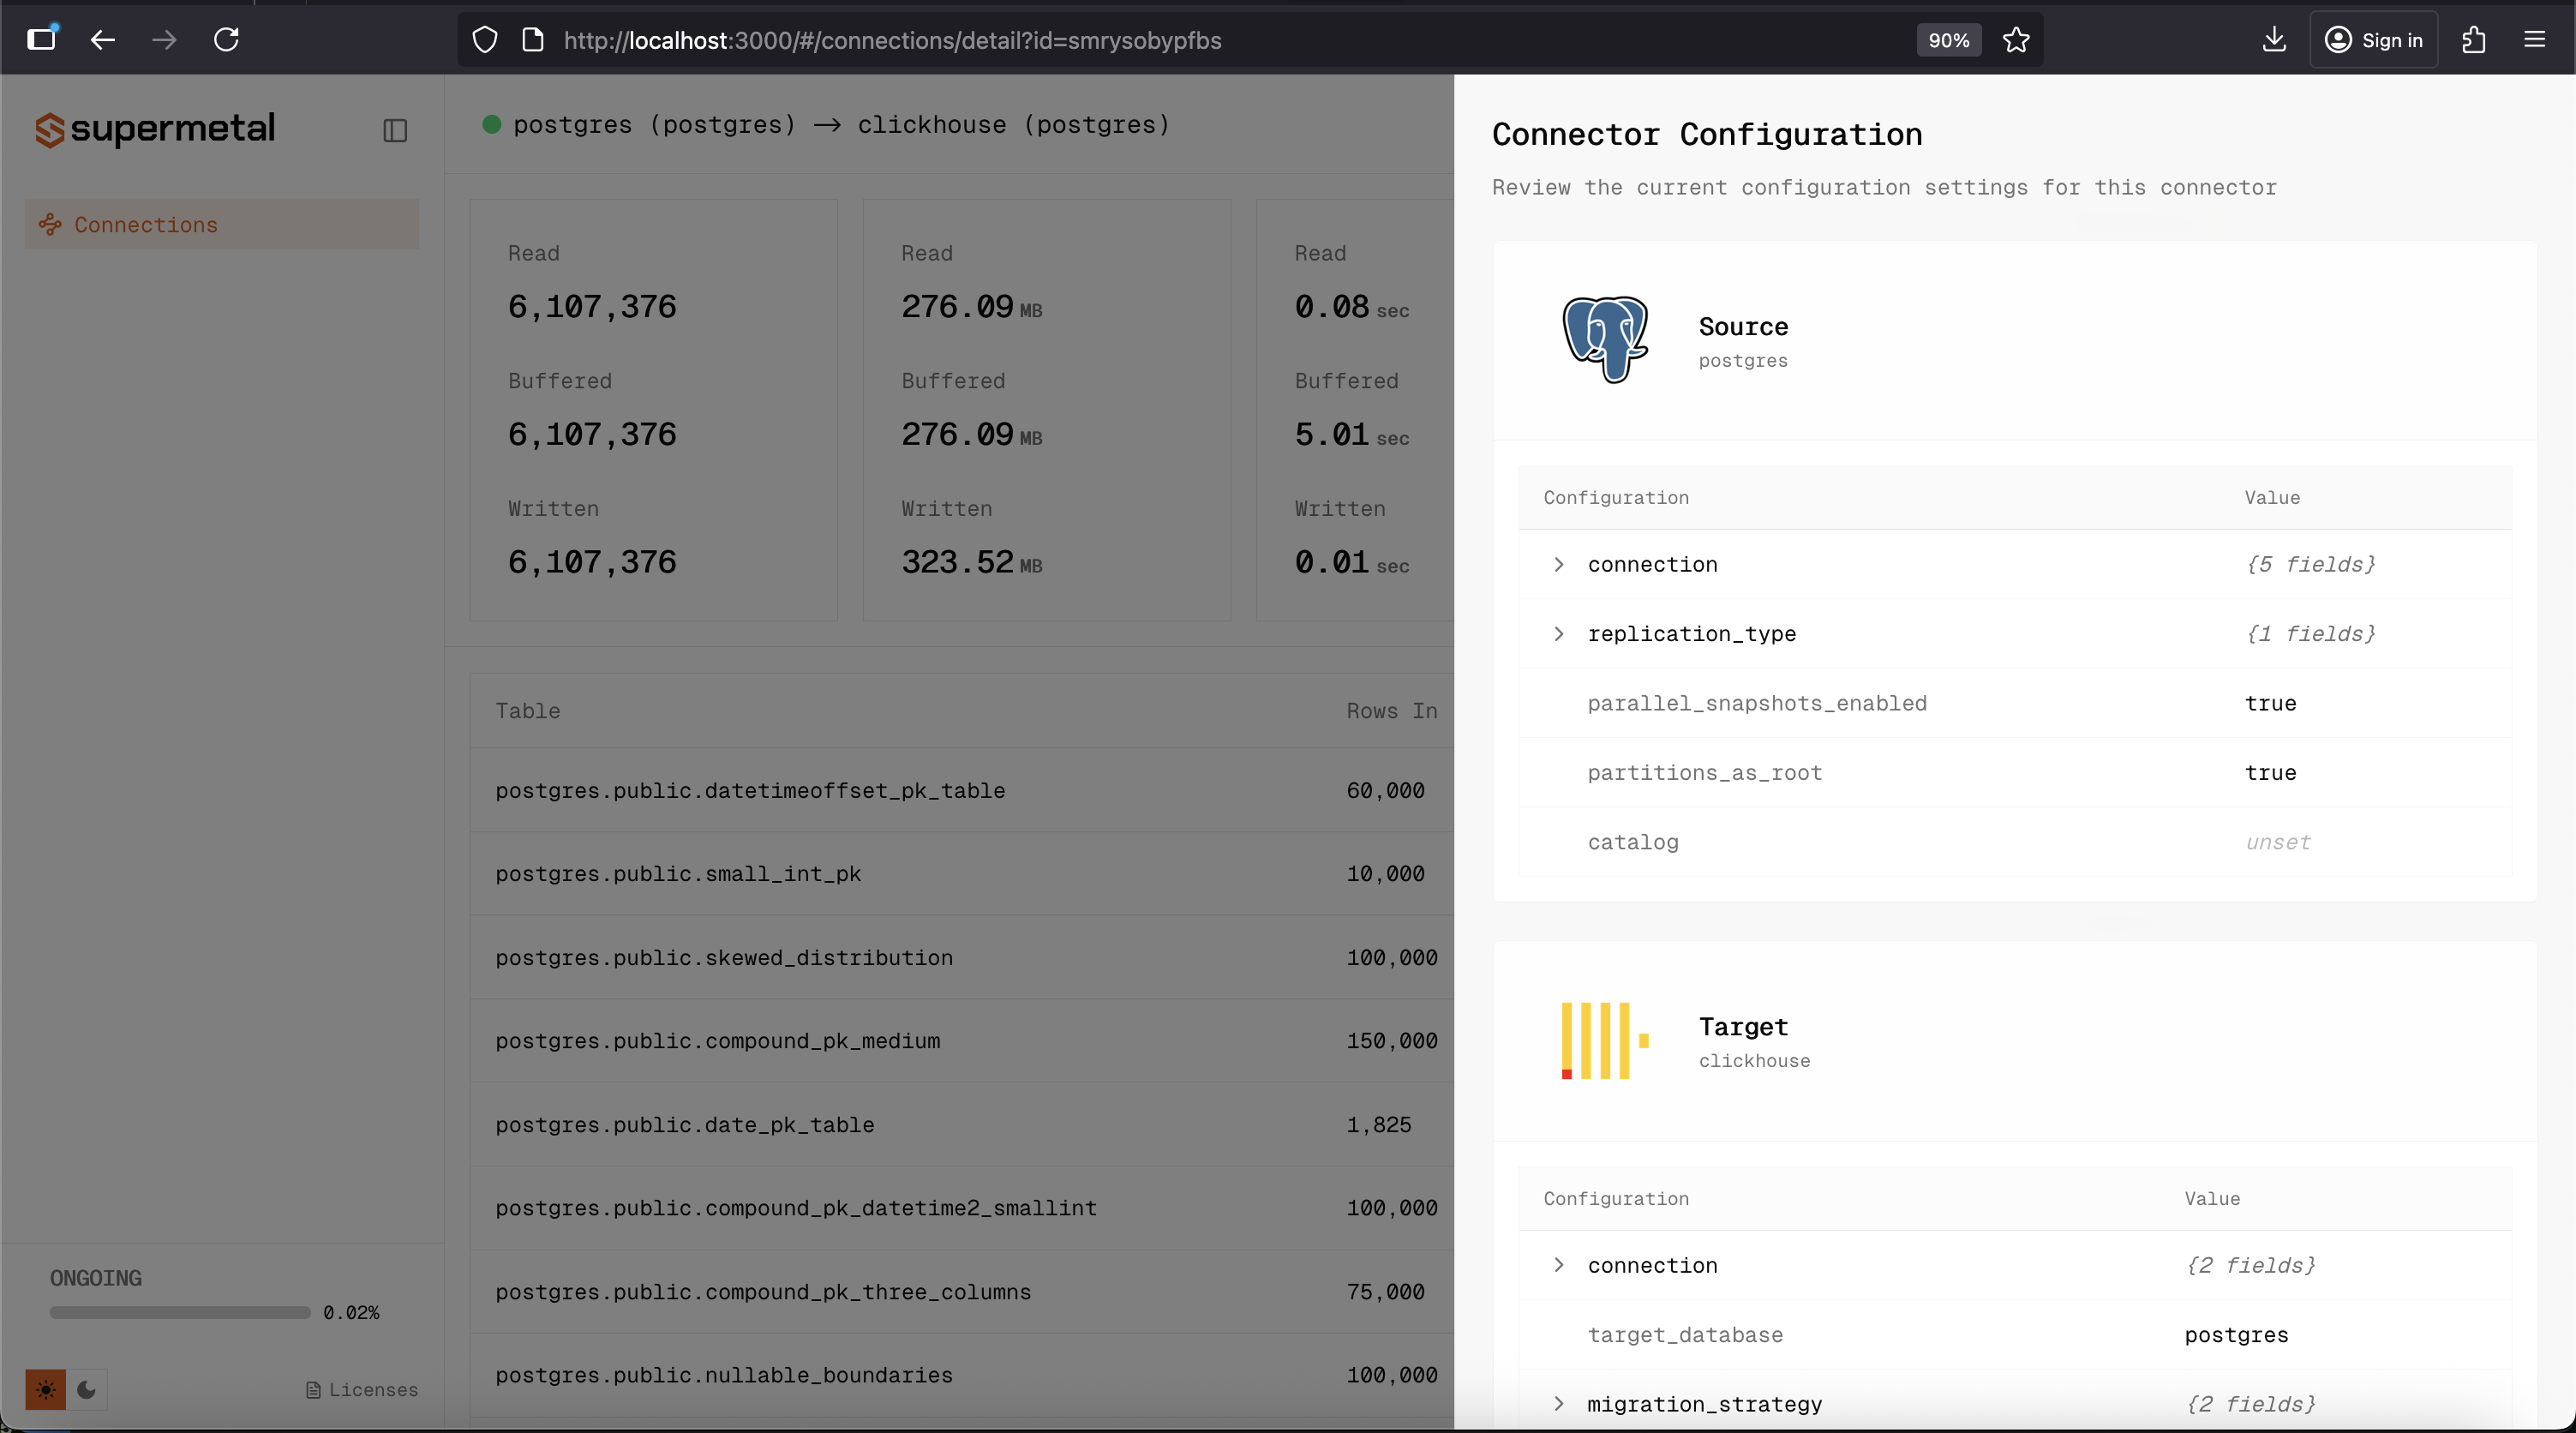
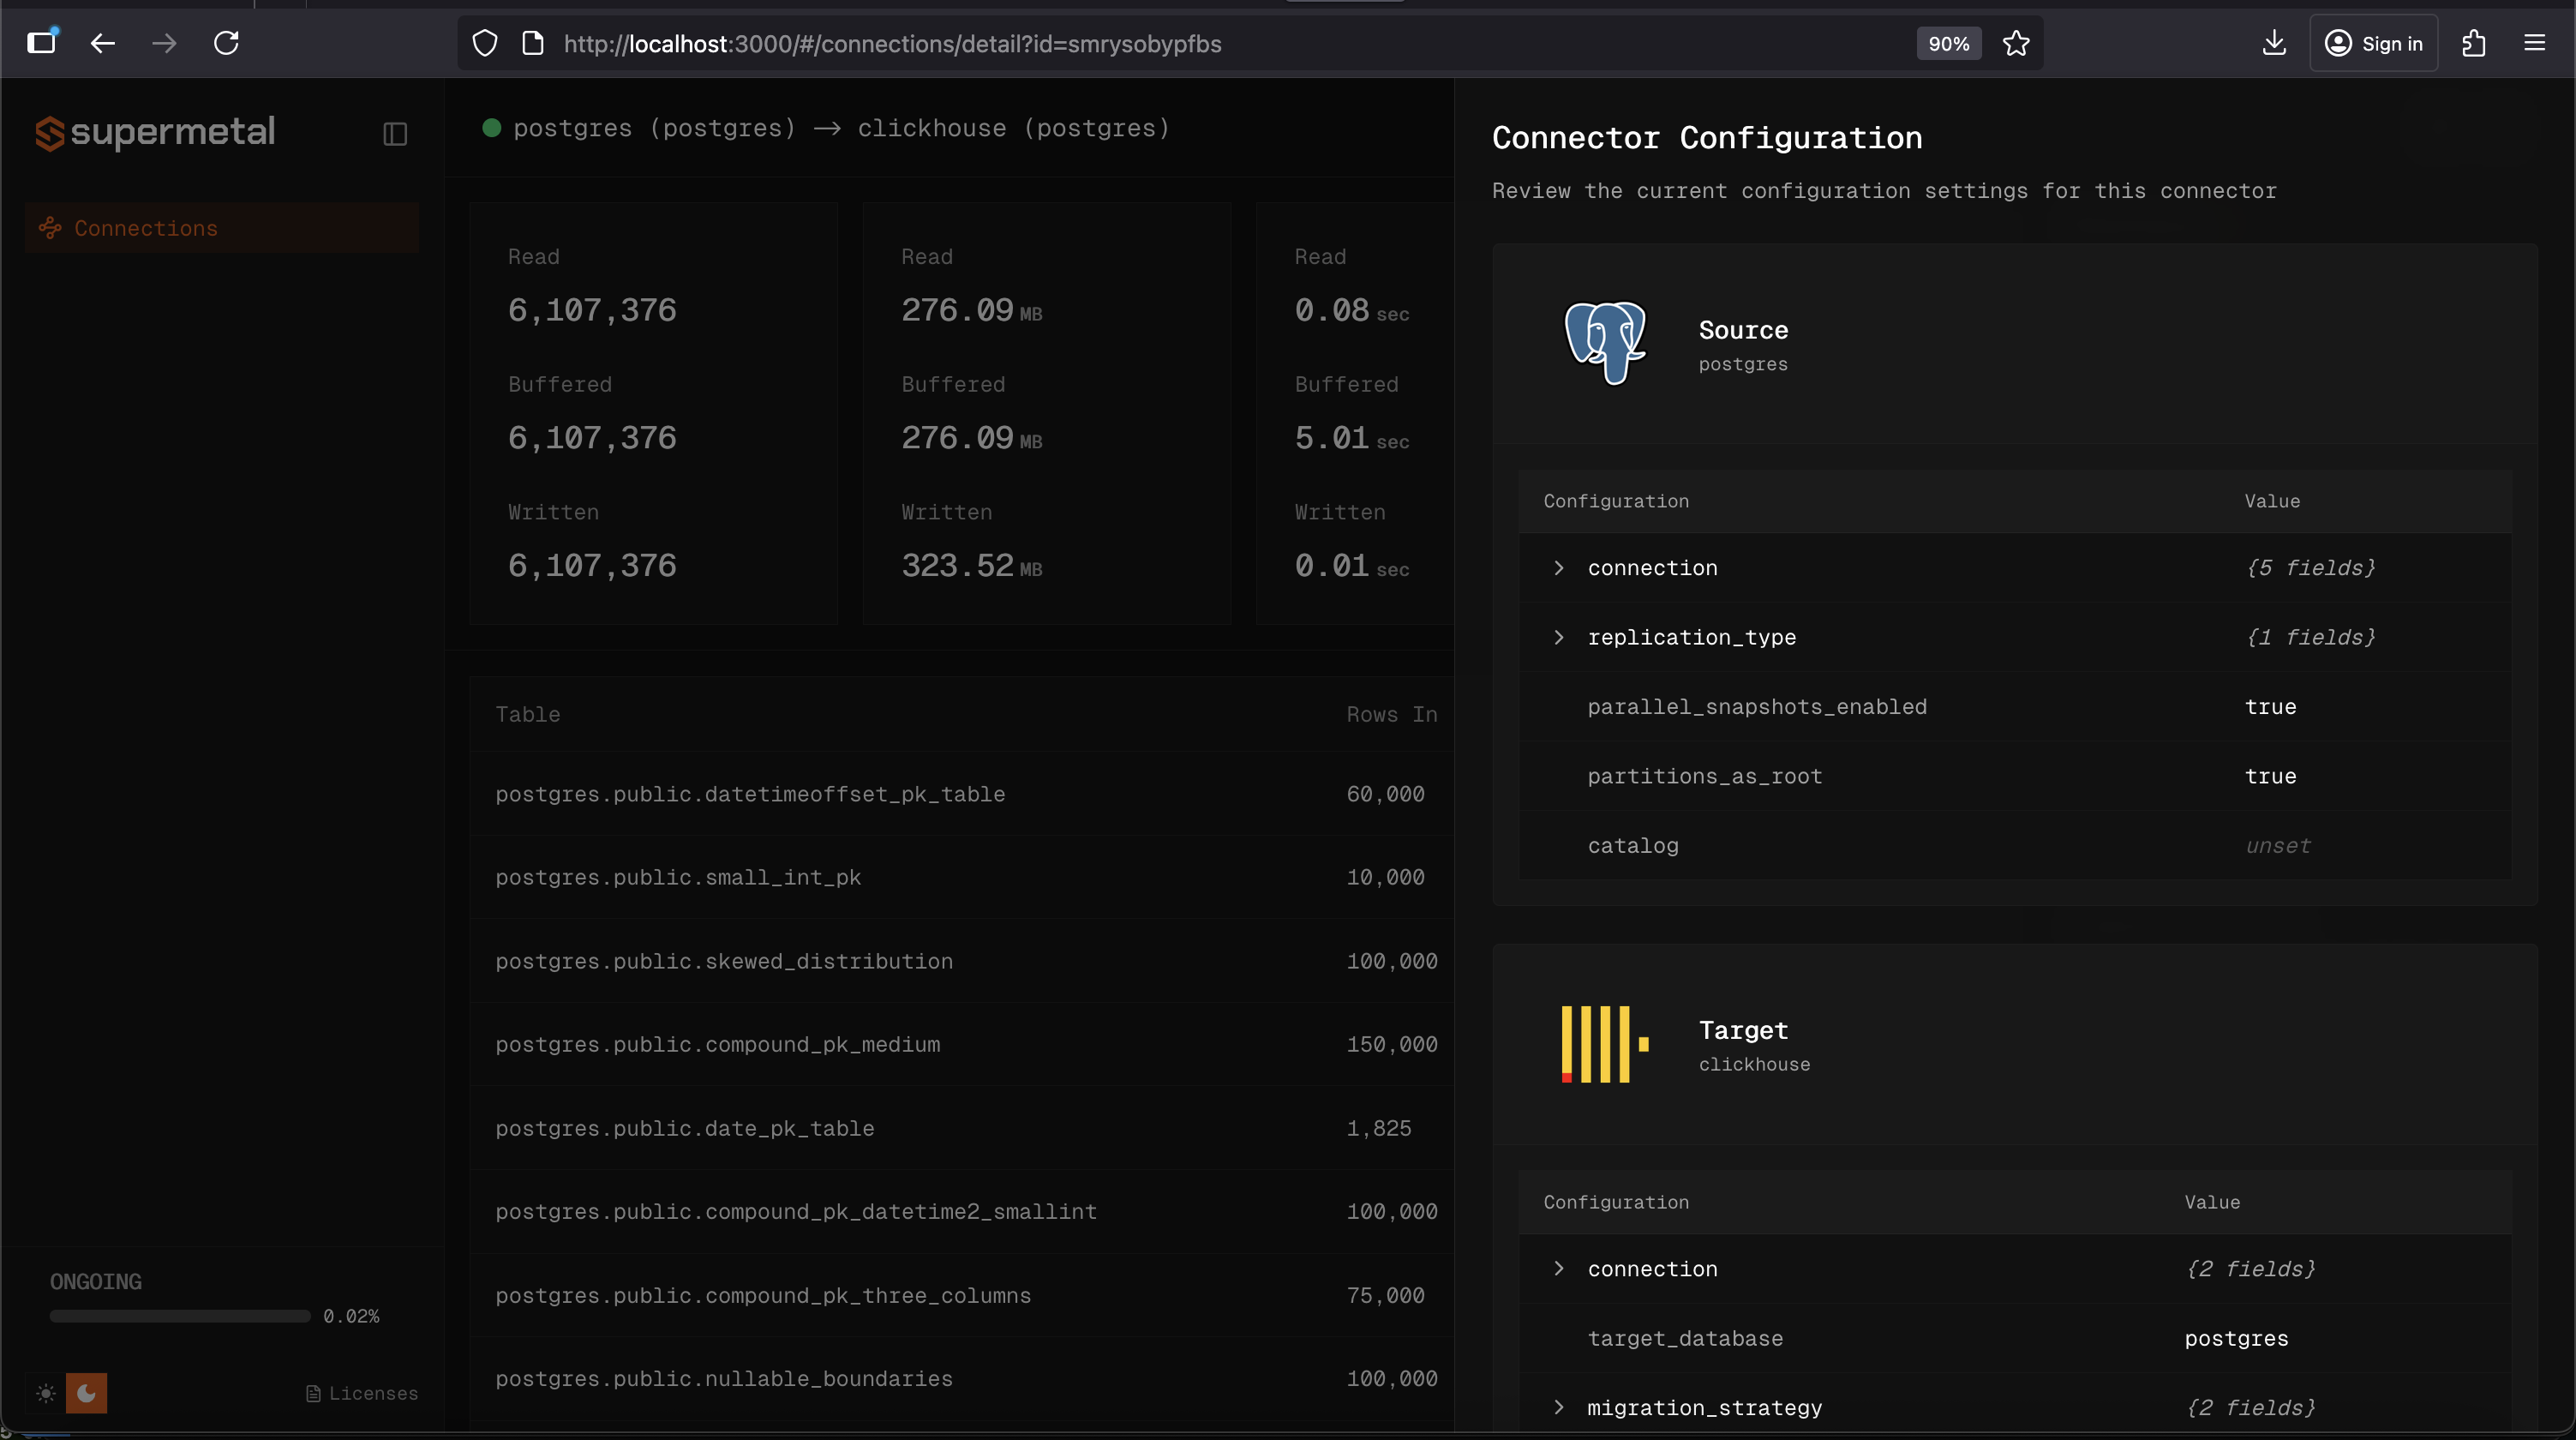
Click the wrench icon in the top right corner to review source, target, and replication settings.
For observability beyond the dashboard, the agent exposes metrics.
Next steps
Last updated on